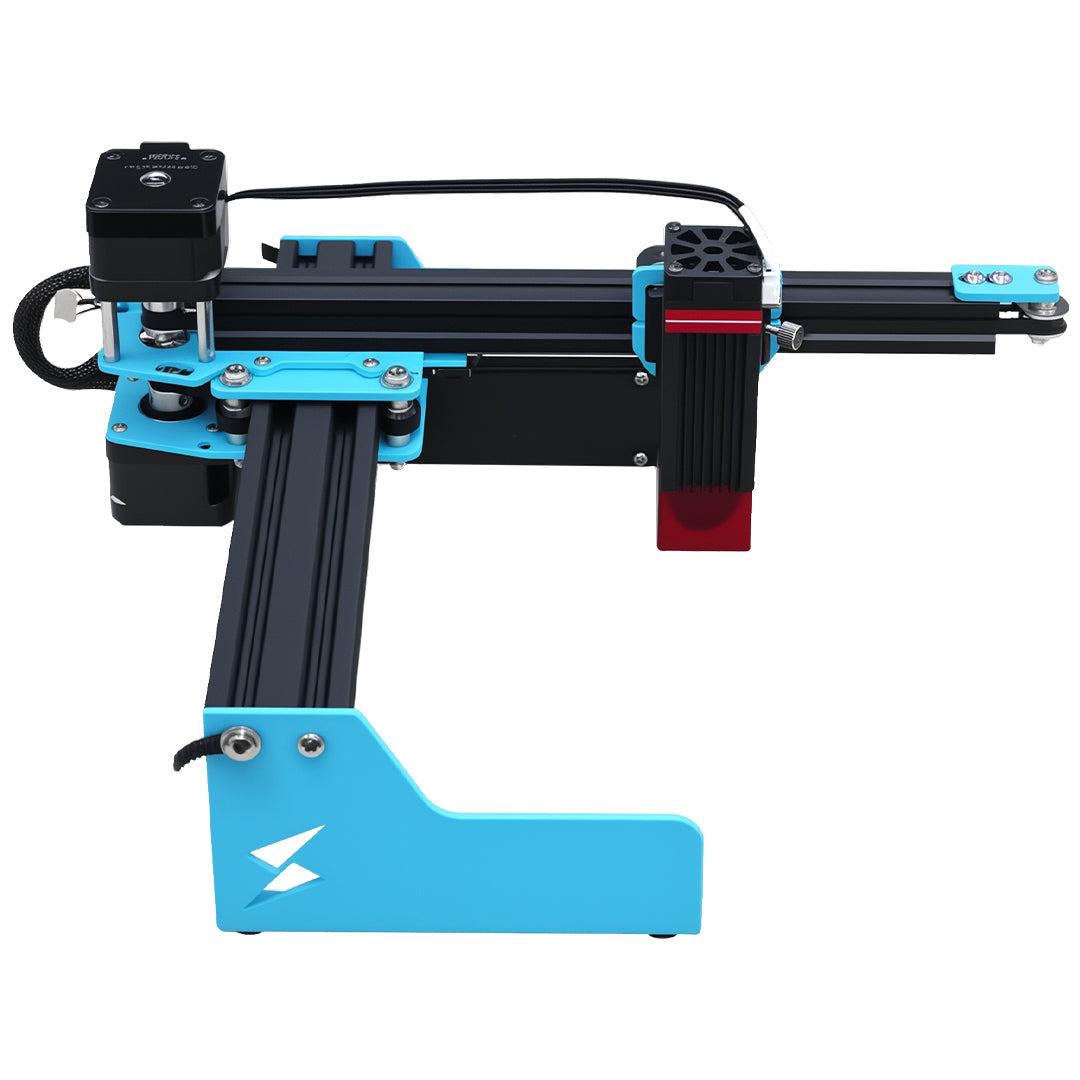


Best Materials for Engraving with Tyvok A1 Mini (Beginner's Guide 2026)
One of the first questions beginners ask after getting their new Tyvok A1 Mini is "What materials can I engrave with this?" The good news is that your A1 Mini can handle a surprisingly wide range of materials, from wood and leather to acrylic and even metal.
In this guide, we'll go over the best materials for beginners to start with, what each material is good for, recommended power and speed settings for the 10W A1 Mini, and which materials you should avoid. Let's get started.
Why Material Matters
Different materials react differently to laser energy. Some materials engrave easily with low power, while others require more power. Some materials produce beautiful contrast, while others don't show much contrast at all. Understanding how different materials work with your laser will help you get better results and avoid wasting time and money on materials that don't work well.
All of the settings we're going to give you are for the 10W version of the Tyvok A1 Mini. If you have the 3.5W version, you'll generally need to cut the speed in half or increase the power by about 50% to get similar results. Always do a test engraving on a scrap piece of material before you do your final project – this is the best way to get the settings right for your specific machine.
Wood: The Most Popular Material for Laser Engraving
Wood is by far the most popular material for laser engraving, and for good reason. It's relatively inexpensive, easy to find, engraves beautifully, and is perfect for everything from keychains to signs to wedding gifts.
Different types of wood produce different results. Here's what you can expect:
Hardwoods (Maple, Birch, Cherry, Oak)
Hardwoods are great for engraving. They have a tight, uniform grain that produces crisp, clear engravings with good contrast. The laser burns the wood, creating a dark brown or black engraving that stands out nicely against the lighter natural wood color.
Recommended settings (10W A1 Mini):
-
Engraving: 30-40% power, 200-300 mm/s
-
Cutting 3mm: 70-80% power, 50-100 mm/s (multiple passes may be needed)
Best for: Almost everything – keychains, signs, jewelry, coasters, cutting boards.
Softwoods (Pine, Balsa, Cedar)
Softwoods are less dense than hardwoods, so the laser engraves faster and cuts easier. However, the grain is usually more open and pronounced, which can make fine details a little less crisp. Softwoods also tend to produce more smoke and can have more resin that leaves residue on your material.
Recommended settings (10W A1 Mini):
-
Engraving: 25-35% power, 250-350 mm/s
-
Cutting 3mm: 60-70% power, 80-120 mm/s
Best for: Projects where you want a more rustic look, or when you need to cut thicker pieces because it cuts easier than hardwood.
Plywood
Plywood is an affordable and versatile material that's perfect for beginners. It's readily available at any hardware store, it's flat, and it cuts cleanly. The quality can vary a lot depending on the plywood – higher-quality plywood with a good hardwood veneer on the surface engraves very nicely. Cheaper plywood with lots of voids and voids in the glue can give you inconsistent results.
Important note: Make sure you use plywood that's glued with non-toxic, formaldehyde-free glue. Some cheaper plywoods use glues that release toxic fumes when lasered.
Recommended settings (10W A1 Mini):
-
Engraving: 30-40% power, 200-300 mm/s
-
Cutting 3mm: 70-80% power, 60-90 mm/s (usually one pass is enough)
Best for: Practice pieces, when you need larger sheets for signs, layered projects.
MDF (Medium Density Fiberboard)
MDF is an engineered wood product that's very dense and uniform. It engraves really well with crisp, dark results, and it's very affordable. However, MDF produces a lot of fine dust when you cut it, and some MDF contains formaldehyde in the glue, which is toxic when burned. If you use MDF, make sure you get the formaldehyde-free kind, and have really good ventilation.
Recommended settings (10W A1 Mini):
-
Engraving: 30-40% power, 200-250 mm/s
-
Cutting 3mm: 80-100% power, 40-60 mm/s
Best for: When you need very uniform, dark engravings, practice pieces, backing for signs.
Bamboo
Bamboo has become really popular for laser projects because it's sustainable and it engraves beautifully. It has a nice light color with subtle grain, and the engraving comes out dark and crisp. It's also very stable and doesn't warp much.
Recommended settings (10W A1 Mini):
-
Engraving: 30-40% power, 250-350 mm/s
-
Cutting 3mm: 70-80% power, 60-80 mm/s
Best for: Coasters, cutting boards, kitchenware, modern-looking signs.
Leather: Perfect for Custom Products
Leather is another fantastic material for laser engraving with your A1 Mini. It's great for making custom wallets, belts, keychains, jewelry, and leather goods. Both genuine leather and synthetic leather work well.
Genuine Leather
Genuine leather engraves really nicely. The laser burns away the surface, creating a dark engraving that has a really nice, natural look. You can also cut leather with your A1 Mini, which makes it perfect for making your own leather products from scratch.
Recommended settings (10W A1 Mini):
-
Engraving: 25-35% power, 300-400 mm/s
-
Cutting 2-3mm: 60-70% power, 80-120 mm/s
Best for: Wallets, belts, keychains, bracelets, leather patches.
Synthetic Leather (Faux Leather)
Faux leather works really well for laser engraving too, and it's usually more affordable than genuine leather. The results are very similar to genuine leather for most purposes, and it's available in a huge range of colors.
One thing to note: Some synthetic leathers contain PVC, which you shouldn't laser because it produces toxic chlorine gas. Make sure you get PU leather (polyurethane) which is safe to laser.
Recommended settings (10W A1 Mini):
-
Engraving: 20-30% power, 300-400 mm/s
-
Cutting 2mm: 50-60% power, 100-150 mm/s
Best for: Jewelry, keychains, earrings, when you want specific colors that are hard to get with genuine leather.
Acrylic: Great for Cutting and Engraving
Acrylic (also called Perspex or Plexiglas) is another very popular material for laser processing. Your Tyvok A1 Mini 10W can easily cut through acrylic up to about 5mm thick, and it engraves really nicely too.
When you laser engrave acrylic, the heat of the laser frosts the surface, creating a beautiful opaque white engraving that contrasts really nicely with clear or colored acrylic. When you cut acrylic with a laser, you get perfectly smooth, polished edges right from the laser – no sanding or polishing needed.
Recommended settings (10W A1 Mini):
-
Engraving: 30-40% power, 200-300 mm/s
-
Cutting 3mm: 70-80% power, 50-100 mm/s
-
Cutting 5mm: 80-100% power, 30-50 mm/s (multiple passes)
Best for: Signs, name tags, jewelry, display stands, coasters, laser-cut parts.
Pro tip: Cast acrylic engraves better than extruded acrylic. Extruded acrylic tends to melt more and can give you less consistent engraving results. When you're buying acrylic for engraving, look for cast acrylic.
Anodized Aluminum: Perfect for Metal Marking
A common misconception is that you need a fiber laser to mark metal. That's not true – your 10W Tyvok A1 Mini can mark anodized aluminum really nicely. The laser removes the colored anodized layer, revealing the bare aluminum underneath, which gives you crisp, high-contrast markings that are permanent.
Anodized aluminum is great for making pet tags, name plates, keychains, tool handles, and all kinds of custom metal projects. You can get blank anodized aluminum pieces in all kinds of colors from laser supply companies.
Recommended settings (10W A1 Mini):
- Engraving: 40-60% power, 150-250 mm/s
Best for: Pet ID tags, keychains, name plates, custom awards.
Can your A1 Mini cut aluminum? No, don't expect it to cut through thick aluminum. But for marking and engraving, it works great. If you want deeper engraving, you can do multiple passes, or you can use a laser marking spray to help get darker markings.
Paper and Cardstock: Great for Crafts and Invitations
Your A1 Mini can cut paper and cardstock incredibly quickly and cleanly. This makes it perfect for things like wedding invitations, greeting cards, paper crafts, stencils, and paper art. The laser cuts incredibly intricate designs that would be impossible to cut by hand or with a die cutter.
Recommended settings (10W A1 Mini):
-
Engraving: 10-20% power, 500-1000 mm/s
-
Cutting: 20-30% power, 300-500 mm/s
Best for: Invitations, greeting cards, paper crafts, stencils, scrapbooking.
One tip when cutting paper: Make sure your material is held perfectly flat. Even a small wrinkle can cause the laser to cut through in the wrong place. Use a low-tack adhesive sheet to hold the paper flat, and you'll get perfect results.
Glass: Can You Engrave Glass with a Diode Laser?
Yes, you can engrave glass with your Tyvok A1 Mini 10W. The results are different from what you get with a more powerful laser, but you can get really nice frosted effects on glass bottles, tumblers, mirrors, and other glass items.
The key to engraving glass with a diode laser is to use low power and multiple passes, and to keep the glass cool. Some people cover the glass with masking tape before engraving, which helps absorb some of the heat and prevents cracking.
Recommended settings (10W A1 Mini):
- Engraving: 20-30% power, 500-800 mm/s, multiple passes
Best for: Custom wine bottles, wedding favors, personalized tumblers, etched mirrors.
Don't expect to get deep engraving on glass with a 10W diode laser, but you can get beautiful frosted markings that look great. Practice on cheap glass first before you try it on an expensive bottle or tumbler.
Stone and Slate
Natural stone like slate, marble, and granite can be engraved with your A1 Mini. The laser doesn't actually remove much material, but it changes the color of the stone, creating a nice dark engraving that contrasts well with the natural stone color.
Slate is particularly popular for laser engraved coasters and plaques because it engraves really well and it's affordable.
Recommended settings (10W A1 Mini):
- Engraving: 40-60% power, 150-250 mm/s
Best for: Coasters, plaques, memorial stones, garden markers.
Rubber and Polymer: Great for Stamps
Laser-cut rubber stamps are a popular product, and your A1 Mini can handle it easily. Special laser engraving rubber is available from laser supply companies, and it produces really clean stamps that give you crisp ink impressions.
Recommended settings (10W A1 Mini):
- Engraving/cutting: 30-40% power, 200-300 mm/s
Best for: Custom rubber stamps, business stamps, invitation stamps.
Materials You Should NEVER Engrave or Cut with Your Tyvok A1 Mini
Not all materials are safe to laser. Some produce toxic fumes that are dangerous to breathe, and some can even damage your machine. Here are the materials you should always avoid:
1. PVC (Polyvinyl Chloride)
PVC is the biggest no-no. When you laser PVC, it produces toxic chlorine gas that will damage your lungs and it will also corrode the metal parts of your machine. Never laser any material that contains PVC. This includes many types of synthetic leather, vinyl, and some plastics. If you're not sure whether a material contains PVC, check with the supplier.
2. Polycarbonate with Flame Retardants
Many polycarbonate materials contain brominated flame retardants, which produce toxic fumes when lasered. Clear polycarbonate that doesn't have flame retardants is generally okay to cut, but it can be hard to know what's in it, so be careful.
3. ABS Plastic
ABS produces cyanide when burned, which is toxic. It's not safe to laser.
4. HDPE (Plastic Milk Bottles)
HDPE melts really easily and doesn't cut well. It tends to warp and melt all over your honeycomb platform. It's not worth the mess.
5. Foam (Most Types)
Most types of foam melt easily and produce toxic fumes when lasered. There are some special laser-safe foams, but most regular foam is not safe.
6. Treated or Pressure-Treated Wood
Pressure-treated wood has chemicals injected into it to prevent rot, and these chemicals produce toxic fumes when burned. Never laser pressure-treated wood.
If you're unsure whether a material is safe to laser, do your research before you put it in your machine. When in doubt, don't laser it. It's not worth risking your health or damaging your machine.
Tips for Getting the Best Results with Any Material
No matter what material you're using, these tips will help you get better results with your Tyvok A1 Mini: - Always do a test – Test your settings on a scrap piece of the same material before you do your final project. This saves you from wasting expensive material when your settings are wrong. - Use a quality honeycomb platform – A Tyvok engraving platform gives you better ventilation, prevents back burning, and keeps your material flat. This improves your results no matter what material you're using. - Keep your material flat and secured – If your material isn't flat or it can move during engraving, you'll get blurry results. Use double-sided tape, low-tack adhesive, or small clamps to hold it in place. - Focus correctly – Always re-focus when you change to a different thickness of material. This is one of the most common mistakes beginners make, and it's the easiest to fix. - Good ventilation isn't just for safety – Good ventilation pulls the smoke away from your material, which gives you cleaner engravings with less soot buildup. You need good ventilation for safety anyway, but it also improves your results.
Which Material Should You Start With?
If you're a beginner just getting started with your A1 Mini, we recommend starting with hardwood or plywood. It's affordable, easy to find, forgiving, and it produces great results. Once you get the hang of engraving wood, you can start experimenting with other materials like leather, acrylic, and anodized aluminum.
As you gain experience, you'll learn what materials you like working with and what kinds of projects you enjoy making. Many people find they specialize in certain types of products – like wooden signs, leather goods, or custom metal tags – and they stick with those materials.
Final Thoughts
Your Tyvok A1 Mini is capable of handling a much wider range of materials than most beginners realize. From wood and leather to acrylic and even anodized aluminum, you can create an amazing variety of projects with just this one small machine.
The key is to start with simple materials, practice your settings, and gradually work your way up to more challenging materials. Keep a log of the settings that work for different materials – this will save you a lot of time later when you come back to the same material again.
Don't be afraid to experiment! That's part of the fun of laser engraving. Try new materials, try new settings, and see what you can create. Before long, you'll be turning out professional-quality projects that you can be proud of.
Just got your A1 Mini and need help setting it up? Check out our complete step-by-step setup guide to get up and running quickly. And don't forget that a quality Tyvok engraving platform will improve your results on every material.
Related Reading: Best Materials For Engraving With Tyvok A1 Mini Beginners Guide
Related Reading: Best Materials for Engraving with Tyvok A1 Mini (Beginner's Guide 2026)
Related Reading: Best Materials For Engraving With Tyvok A1 Mini Beginners Guide
💡 Recommended: The Tyvok P2 2W Galvo Laser is our top pick for metal marking & jewelry engraving. Currently 50% OFF at just $149!