


Can You Laser Engrave Granite and Natural Stone? Settings and Results 2026
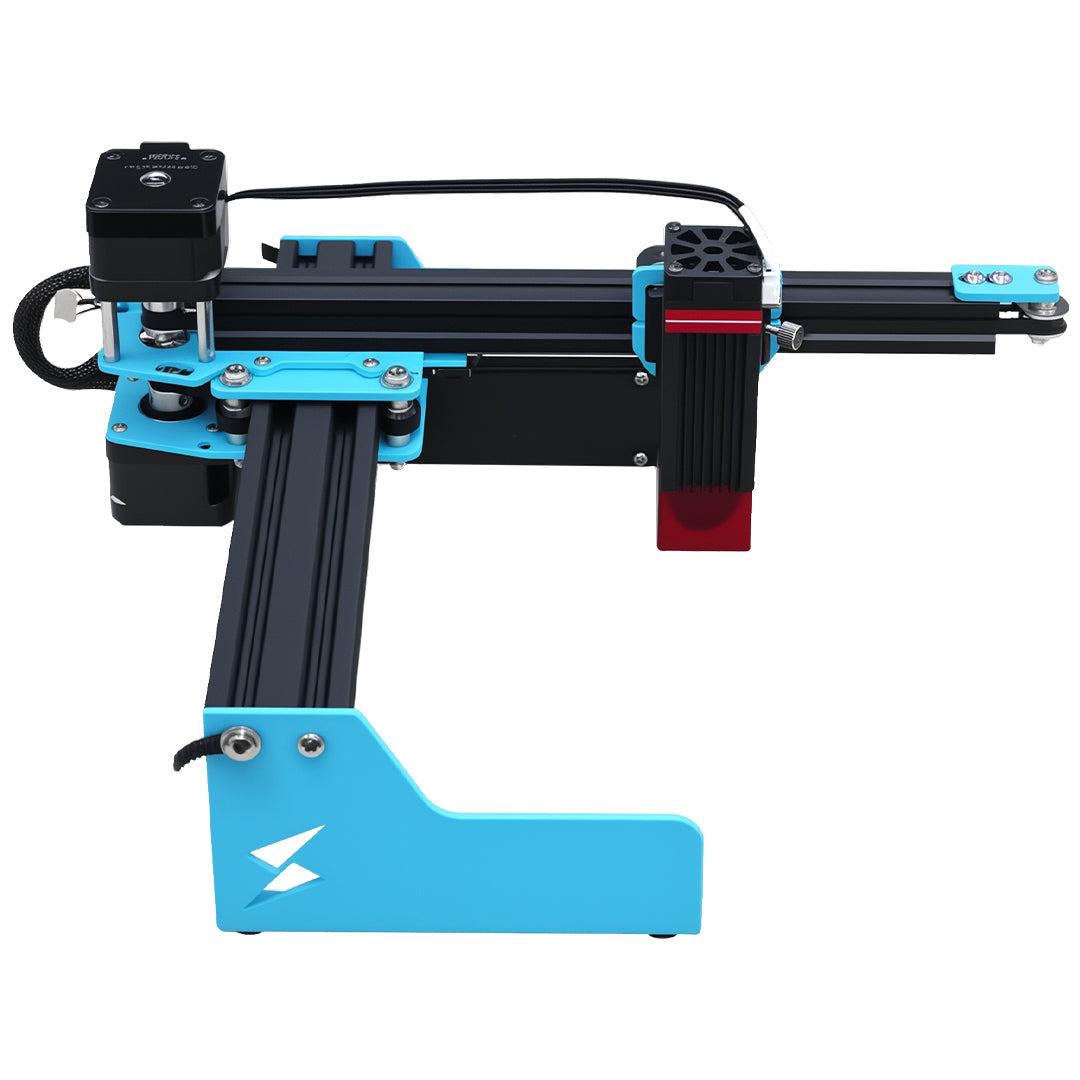
If you've ever seen a beautifully engraved granite plaque or a custom stone coaster, you might be wondering if you can do this yourself with a desktop laser engraver like the Tyvok A1 Mini or Tyvok P2. One of the most common questions we get from beginners is "Can you actually laser engrave granite and natural stone with an entry-level diode laser?"
The short answer might surprise you. In this complete guide, we'll cover everything you need to know about engraving granite and other natural stones with a 10W diode laser, including what results you can expect, what settings to use, and tips for getting the best outcomes.
The Short Answer: Yes, You Can Engrave Granite with a 10W Diode Laser
While it's true that granite is an extremely hard material, modern diode lasers like the 10W in the Tyvok A1 Mini are more than powerful enough to create clear, permanent engravings on granite and most other natural stones. You won't be cutting all the way through thick granite slabs (that requires much more powerful industrial lasers), but for surface engraving – which is what 99% of hobbyists and small businesses need for things like plaques, coasters, and memorial stones – it works perfectly.
The key is understanding that laser engraving on stone is a surface process that creates contrast by discoloring the stone, not removing a lot of material. With the right settings and technique, you can get beautiful, high-contrast engravings that will last forever outdoors.
What Types of Stone Can You Laser Engrave?
Not all stones are created equal when it comes to laser engraving. Here's how common natural stones work with a diode laser:
Granite
Difficulty: Easy to moderate
Result: Good contrast, permanent engraving
Best for: Plaques, memorial markers, coasters, outdoor signage
Granite is actually one of the best natural stones for laser engraving with a diode laser. It produces good contrast (usually a lighter, whitish-gray engraving against the darker polished surface), and it's very durable. The results are permanent and weather-resistant, so it's perfect for outdoor use.
Marble
Difficulty: Moderate
Result: Low to moderate contrast (engraving is usually lighter or darker depending on the marble)
Best for: Decorative items, coasters, tiles
Marble can be trickier because different types produce different contrast. Some marbles show a clear light engraving, while others have very low contrast. It's worth testing with your specific marble to see what results you get.
Slate
Difficulty: Easy
Result: Excellent high-contrast engraving (white against dark slate)
Best for: Coasters, plaques, signage
Slate is actually one of our favorite stones for beginners to practice on. It gives really high contrast results, the engraving comes out crisp, and it's relatively inexpensive. If you're just getting started with stone engraving, slate is a great material to practice on (we have a separate complete guide to engraving slate).
Sandstone
Difficulty: Moderate
Result: Good contrast, but very porous and dusty
Best for: Decorative items, not recommended for high-detail work
Sandstone is porous and the laser creates a lot of dust. It will engrave, but it's harder to get crisp, clean details because of the porous nature of the stone.
Soapstone
Difficulty: Easy
Result: Good contrast, soft stone that engraves easily
Best for: Carvings, decorative items, bowls
Soapstone is much softer than granite or marble, so it engraves very easily. You can get deeper engravings faster, which can create good contrast.
Limestone
Difficulty: Moderate
Result: Moderate contrast
Best for: Tiles, decorative items
Limestone works, but it's softer than granite and can be more prone to chipping. It's fine for basic engraving, but not as durable as granite for outdoor use.
Quartz / Engineered Stone
Difficulty: Moderate
Result: Good contrast, similar to granite
Best for: Countertop samples, coasters
Engineered quartz actually engraves very similarly to granite. It produces good contrast and clean results. Just watch out – some engineered stones have resin binders that can produce more smoke when engraved.
What Results Can You Expect with a 10W Diode Laser?
It's important to set realistic expectations when engraving granite with an entry-level diode laser:
What You CAN Do:
- Surface engraving text and graphics: Everything from simple text plaques to complex photographic engravings works
- Coasters and small decorative items: Perfect for personalized gifts
- Memorial plaques and markers: Permanent, weather-resistant results that will last outdoors
- Signage and address markers: Durable enough for years of outdoor exposure
- Photographic engraving: You can actually get really good grayscale photo engravings on granite
What You CANNOT Do:
- Cut through thick slabs of granite: Cutting through even 1cm granite requires industrial CO2 lasers with hundreds of watts of power
- Deep 3D carving: You can do some shallow 3D engraving, but deep carvings will take a very long time with a 10W diode
- Engrave extremely large pieces: Limited by your machine's bed size (the A1 Mini has a 170mm × 170mm bed, which works for most small to medium projects)
For 95% of the projects that beginners and small businesses want to do, the capabilities of the 10W A1 Mini are more than enough. The results you get will be indistinguishable from professionally engraved stone for most applications.
Recommended Settings for Engraving Granite with 10W
Here are our recommended starting settings for engraving granite with the Tyvok A1 Mini 10W. Always do a test engraving on a scrap piece first, because different granites can behave differently.
| Type of Engraving | Speed (mm/s) | Power (%) | Passes | Line Distance (DPI) |
|---|---|---|---|---|
| Text / Line Art (low detail) | 200-300 | 80-100 | 1 | 0.15mm (~170 DPI) |
| Text / Graphics (medium detail) | 150-200 | 80-100 | 1 | 0.10mm (~250 DPI) |
| High detail / Photos | 100-150 | 70-90 | 1-2 | 0.08mm (~315 DPI) |
| Deeper engraving | 150 | 80-100 | 2-3 | 0.10mm |
Important Notes About Settings:
-
Start with one pass: Most of the time, one pass is enough to get good contrast on granite. You only need multiple passes if you want deeper engraving.
-
Higher DPI for photos: If you're doing a photographic engraving, you need smaller line distance for the grayscale tones to show up properly.
-
Adjust for your specific granite: Some darker granites need a little more power to get good contrast. If the engraving is too faint after one pass, just run another pass.
Step-by-Step: How to Engrave Granite with Your Tyvok A1 Mini
Here's our complete process for getting great results engraving granite:
Step 1: Prepare Your Stone
Make sure your granite is clean and dry. Wipe it down with a soft cloth to remove any dust or oil from handling. If it's very dirty, wash it with mild soap and water and let it dry completely before engraving.
It's important that the surface is as flat as possible. If the granite isn't flat, you'll get uneven engraving where some areas are out of focus.
Step 2: Get the Focus Right
Proper focus is absolutely critical for getting good results on hard materials like granite. Use the focus gauge that came with your A1 Mini to set the correct distance between the lens and the stone surface.
Because granite is often thicker than wood or other materials, you might need to adjust your bed height to get the focus right. Double-check the focus before you start – it only takes 30 seconds and it makes a huge difference.
Step 3: Secure the Stone
Granite is heavy, which helps hold it in place, but you should still secure it to your bed to prevent it from moving during the engraving. You can use double-sided tape, blue painter's tape, or small clamps around the edges.
Make sure the stone doesn't rock or move when you touch it. Even a tiny movement during a long engraving will ruin your results.
Step 4: Do a Test Engraving
Always do a small test engraving in an inconspicuous area first. This lets you check:
- Is the contrast good enough?
- Do you need more power or another pass?
- Is the focus correct?
It's much better to waste 5 minutes on a test than to ruin a nice piece of granite.
Step 5: Run the Engraving
Start the engraving job. Keep an eye on it at the beginning to make sure the laser is firing correctly and the stone isn't moving. Stone engraving doesn't produce as much smoke as wood or acrylic, but you still need good ventilation to pull the fine stone dust away.
Step 6: Clean the Engraving
After the engraving is done, let the stone cool for a few minutes, then brush off the dust with a stiff brush. You can also rinse it under water to remove all the fine dust.
Let it dry completely, then look at your results. If you want deeper or darker engraving, you can run another pass with the same settings.
Tips for Getting Better Results Engraving Granite
These pro tips will help you get the best possible contrast and detail when engraving granite:
1. Choose the Right Granite
Not all granite is the same. For best results:
- Darker granite = better contrast: Dark, polished black or dark gray granite usually gives the best contrast – the engraving comes out lighter, so it stands out well.
- Avoid heavily patterned granite: Very busy patterns with lots of variation can make your engraving hard to read. Solid-color or consistently patterned granite works best.
- Polished vs unpolished: Polished granite usually gives cleaner, crisper results than unpolished. Unpolished granite can be more porous and produces more dust.
2. Use Masking Tape to Keep It Clean
Just like when cutting wood, you can cover your granite with blue painter's masking tape before engraving. This helps keep the surface clean and prevents dust from getting into the pores. After engraving, you just peel off the tape and brush off any remaining dust.
This is especially helpful if you're doing detailed engraving where you want a clean surface around the engraving.
3. Consider Reverse Engraving for Translucent Stones
If you're working with a translucent stone like white marble, you can actually do reverse engraving through the back. This gives you a really smooth, polished surface on the front, and the engraving shows through from the back. This technique works great for lighting projects and illuminated signs.
4. Seal the Engraving (For Outdoor Use)
While granite itself is already weather-resistant, sealing the engraving can help prevent dirt from getting into the engraved areas and make it easier to clean. You can use a penetrating stone sealer – just apply it to the entire surface after engraving and cleaning.
This is especially important for memorial plaques and outdoor signs that will be exposed to the elements.
5. Multiple Passes for Deeper Engraving
If you want a deeper engraving that's more pronounced, you can do multiple passes. Let the stone cool between passes, and make sure it doesn't move. Two or three passes will give you a deeper, more visible engraving without taking too much extra time.
6. Watch Out for Thermal Shock
Some types of stone can crack if they get too hot during engraving. This is more common with very thick pieces. To avoid thermal shock:
- Don't run multiple passes back-to-back without letting the stone cool down
- Make sure you have good ventilation to help dissipate heat
- For very thick stone, consider doing one pass per day to let it cool completely
This is rarely an issue with surface engraving on thin pieces like coasters, but it's something to keep in mind for thicker slabs.
7. Safety First: Dust Protection
Engraving stone produces fine stone dust, which can be harmful if inhaled. Always:
- Use proper ventilation – an air assist and a fume extractor helps pull dust away
- Wear a dust mask when cleaning the stone after engraving
- Wet down the stone before brushing to keep dust down
Your health is more important than any project – always take proper safety precautions.
Common Problems (and How to Fix Them)
Here are the most common issues people run into when engraving granite, and how to fix them:
Problem: The engraving is too faint / low contrast
Solution: Try increasing the power by 10%, or run another pass. Some darker granites need more power to get good contrast. Make sure your lens is clean – a dirty lens reduces effective power. Also check your focus – if the laser isn't in focus, it won't engrave as deeply.
Problem: The engraving is uneven
Solution: Your stone probably isn't flat, or it's rocking. Make sure the surface is flat and the stone is securely held so it doesn't move. Check that your bed is level and the focus is consistent across the entire surface.
Problem: The stone cracked during engraving
Solution: This is thermal shock. The stone got too hot too quickly. Next time, let it cool between passes, don't run multiple passes back-to-back. Thicker stones are more prone to this.
Problem: There's a lot of dust everywhere
Solution: That's normal when engraving stone. Use masking tape on the surface to contain dust, wet the stone when cleaning to keep dust down, and make sure your ventilation is working properly. Always wear a dust mask when cleaning.
Problem: The edges of the engraving are chipped
Solution: Some softer stones like limestone are more prone to chipping. Try reducing your power slightly and adding another pass instead. Make sure your speed isn't too slow – slower speed means more heat, which can cause more chipping in soft stones.
What Projects Can You Make Engraving Granite?
Granite engraving opens up a lot of great project possibilities, especially for personalized gifts:
- Personalized granite coasters – very popular wedding and housewarming gifts
- Memorial plaques and pet markers – permanent and weather-resistant
- House address signs – will last decades outdoors
- Corporate awards and recognition plaques – professional, durable results
- Decorative garden stones – great for landscaping
- Custom engraved keychains – small, easy projects for beginners
- Photographic engravings – stunning results on dark granite
When Do You Need More Power?
For most surface engraving projects on granite, the 10W A1 Mini is more than enough power. But there are a couple of situations where you might want more:
- You need to do deep 3D carving: If you want to carve deep 3D relief into granite, you'll get done faster with a more powerful laser. But for most people, this isn't something they need to do very often.
- You're doing production work: If you're engraving dozens of granite plaques every week, more power will let you finish jobs faster. For occasional use, the 10W is fine.
The good news is that when you're just starting out, you don't need more than 10W. You can learn the process and get great results with the A1 Mini, and upgrade later if you need more capacity.
Final Thoughts
So to answer the original question: Yes, you absolutely can laser engrave granite and natural stone with a 10W diode laser like the Tyvok A1 Mini. While you won't be cutting through thick slabs, for the surface engraving that most people need – coasters, plaques, signs, memorials – the results are excellent and permanent.
The key is setting realistic expectations, using the right settings, and following the proper process. Dark granites give the best contrast, slate is actually one of the easiest stones for beginners to start with, and with the right technique you can get professional-quality results right on your desktop.
Whether you're looking to make personalized gifts for friends and family, start a small side business doing custom engraving, or just expand the types of projects you can do with your laser, engraving granite is definitely within reach with an entry-level 10W diode laser.
Whether you're just starting out with the versatile Tyvok A1 Mini or you need the speed and precision of the Tyvok P2 for production work, both machines are more than capable of producing beautiful, permanent engravings on granite and other natural stones.
New to laser engraving and not sure where to start? Check out our complete beginner's guide to laser engraving different types of wood to learn the basics of working with the most common laser engraving material.
Related: materials list
Related: settings guide
Related: metal engraving guide