


10 Common Laser Engraving Mistakes Beginners Make (And How to Avoid Them)
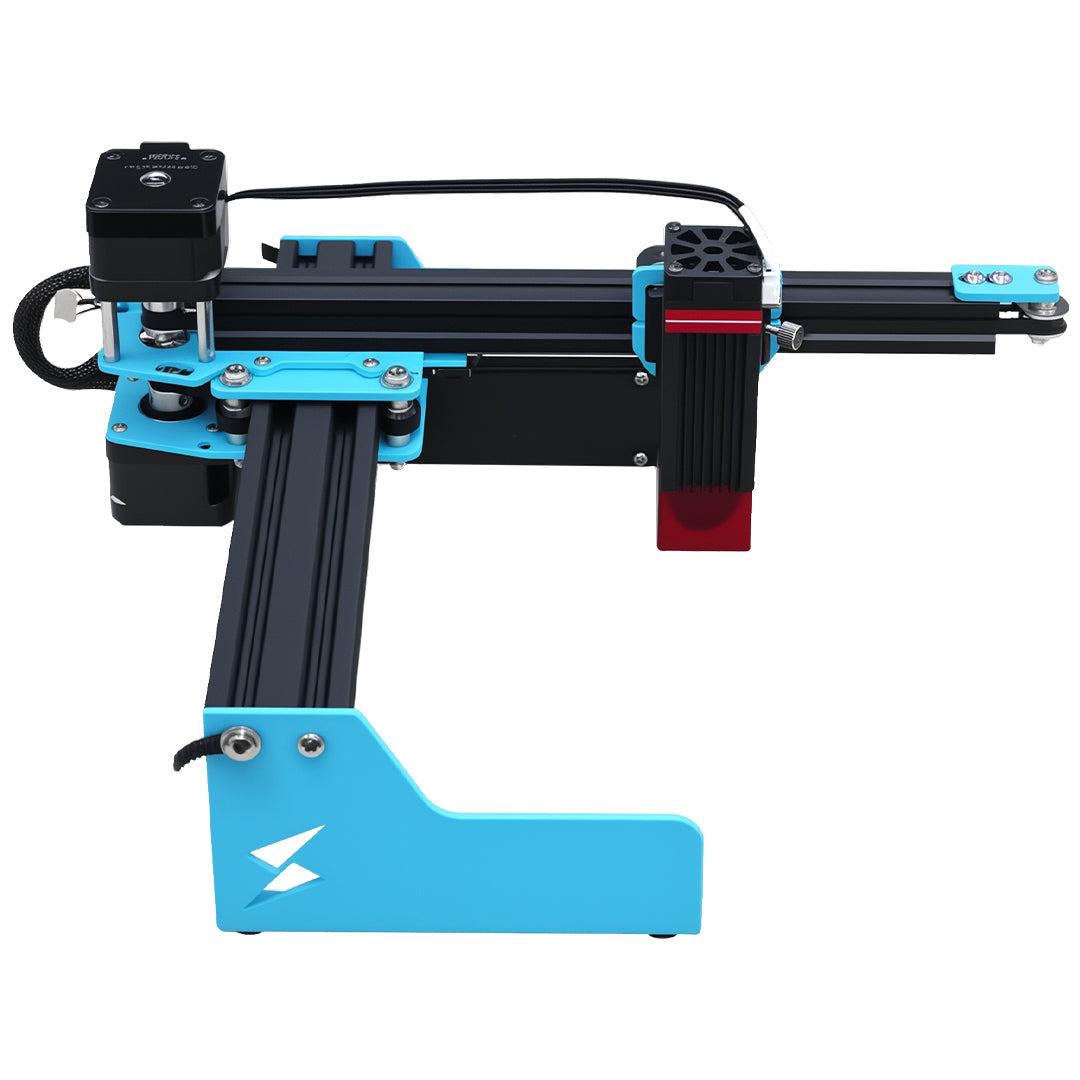
When you're new to laser engraving with a machine like the Tyvok A1 Mini, it's normal to make some mistakes. Even experienced laser users make mistakes occasionally. But knowing what the most common mistakes are and how to avoid them can save you a lot of time, money, and frustration.
In this article, we'll cover the 10 most common mistakes beginners make when they're starting out with laser engraving, and we'll show you how to avoid them. Let's get started.
---
1. Not Focusing the Laser Correctly
This is the number one mistake beginners make, and it's also one of the easiest to avoid. If your laser isn't focused correctly, your engravings will be blurry, faint, or just not right.
What happens when you get focus wrong:- The laser energy is spread out over a larger area instead of being focused on the surface of your material
- Your engravings come out blurry and faint
- You can't get deep cuts even with full power
Pro tip: Get in the habit of checking focus before every job. Even if you're using the same thickness as last time, it's good to double-check. It's easier to check it before you start than to redo the whole job after it comes out wrong.
---
2. Using the Wrong Power and Speed Settings
Another very common mistake is using the wrong power and speed settings for the material you're engraving or cutting. Different materials need different settings, and if you just use the same settings for everything, you'll get inconsistent results.
What happens when you get settings wrong:- Too much power/slow speed: Too much burning, charred edges, ruined material
- Too little power/fast speed: Engraving is too faint, doesn't cut all the way through
- Start with the recommended settings for your material (we have recommended settings for most common materials in our materials guide for the A1 Mini)
- Always do a test on a scrap piece of the same material before you do your final project. This only takes a minute, and it saves you from ruining your good material.
- Keep a log of the settings that work for different materials. After you do a few tests, you'll have your own reference that you can go back to.
---
3. Skipping the Quality Honeycomb Platform to Save Money
Many beginners try to save money by skipping the honeycomb platform and just using whatever scrap wood or metal they have lying around. This is a mistake because the platform affects every project you do.
What happens when you don't use a proper honeycomb platform:- Back burning on the bottom of your material because the laser hits a solid surface after cutting through
- Poor ventilation means more smoke residue on your project, so you get more cleaning up
- Your material isn't perfectly flat, so some areas are out of focus
- Smoke can't get away, which makes your engravings look dirty
---
4. Not Cleaning the Laser Lens Regularly
Laser engraving produces smoke, and that smoke leaves residue on your laser lens over time. Many beginners forget to clean the lens, and then they wonder why their laser doesn't seem to have as much power as it used to.
What happens when your lens is dirty:- The smoke residue absorbs some of the laser energy, so you get less power reaching your material
- Your engravings come out fainter than they should
- Your cuts don't go all the way through even with the same settings you used before
If you do a lot of cutting, you might need to clean it more often – cutting produces more smoke than engraving. It only takes a couple of minutes, and it keeps your laser working at full power.
---
5. Not Securing Your Material Properly
If your material moves while the laser is engraving or cutting, your whole project is ruined. Many beginners don't secure their material well enough, especially small pieces.
What happens when your material moves:- The engraving is blurry or doubled
- The cut line is off where it's supposed to be
- You have to throw the whole piece away and start over
- Use double-sided tape to hold down flat sheets of material
- Use small clamps for thicker or larger pieces
- Make sure the material is lying perfectly flat on the engraving platform
- Give the material a gentle push before you start to make sure it doesn't move
It only takes an extra 30 seconds to secure your material properly, and it saves you from ruining a whole project.
---
6. Leaving the Machine Unattended While It's Running
This is not just a mistake – it's a safety issue. Many beginners think "It's just a small laser, nothing can go wrong" so they start a job and then leave the room to do something else.
What can go wrong:- If a piece of material catches fire, nobody is there to put it out quickly
- If something goes wrong with the machine, you can't stop it immediately
- Fire can spread quickly, and what would have been a small problem becomes a big one
This is one of the most important laser safety rules, and it's really important to follow it every time.
---
7. Engraving or Cutting Toxic Materials
Not all materials are safe to laser, and some materials are actually very toxic when you burn them. Many beginners don't know this, and they'll laser anything they have lying around.
Which materials are toxic and should never be lasered:- PVC (any plastic that contains polyvinyl chloride) – produces toxic chlorine gas
- ABS plastic – produces cyanide when burned
- Pressure-treated wood – has toxic chemicals in the treatment
- Most types of foam – produce toxic fumes
- Any material you don't know what it is – when in doubt, don't laser it
- You breathe in toxic fumes that can make you sick
- The toxic fumes can corrode your machine
- It's just not worth the risk to your health
---
8. Trying to Cut Too Thick in One Pass
When beginners need to cut through a thicker piece of wood, they often think "I'll just turn the power all the way up and cut it in one pass." This doesn't work very well, and it causes more problems than it solves.
What happens when you try to cut too thick in one pass:- You get a lot of extra charring on the edges because the laser has to dwell longer with full power
- The heat can cause the wood to warp or burn more than necessary
- It's actually slower than doing multiple lighter passes because you have to wait for it to cool
Multiple passes take a little more time, but the result is much better. And with 10W, you can cut through most thicknesses that beginners need with just 2-3 passes.
---
9. Forgetting About Safety Gear
Safety gear isn't expensive, but many beginners forget to get it or they don't use it because they think it's not necessary.
The most important safety gear you need:- Laser safety glasses: You must wear glasses that are rated for the 450nm wavelength of your diode laser. Never run the laser without them – even a quick accidental reflection can cause permanent eye damage.
- Good ventilation: You need to pull the smoke and fumes out of the machine and either vent them outside or filter them with a fume extractor. Breathing laser smoke isn't good for you, and it also leaves more residue on your projects.
---
10. Getting Discouraged When Your First Projects Don't Turn Out Perfect
Every beginner messes up their first few projects. It's normal. Laser engraving is a skill that takes practice. Even experienced users mess up occasionally.
What happens when you get discouraged:- You give up too early before you learn the skills
- You don't get to experience how fun and rewarding laser engraving can be
The Tyvok A1 Mini is a great machine for beginners because it's forgiving and easy to use, but you still need to practice to get good results. Give yourself time to learn, and don't give up after the first mistake.
---
Wrapping Up: How to Avoid These Mistakes with Your Tyvok Laser
Most of these common mistakes are really easy to avoid once you know about them. Here's a quick recap of what you need to remember:
1. Always check your focus before every job 2. Always test your settings on scrap first 3. Invest in a quality Tyvok engraving platform – it's worth it 4. Clean your lens regularly 5. Secure your material so it can't move 6. Never leave the machine unattended 7. Only laser materials that you know are safe 8. Do multiple passes for thicker material instead of one high-power pass 9. Always use your safety gear 10. Don't get discouraged – practice makes perfect
If you just got a new Tyvok A1 Mini and you're just starting out, don't worry about making mistakes. Everybody makes them when they're new. Just follow these tips, learn from your mistakes, and before you know it, you'll be turning out perfect projects every time.
The nice thing about starting with a Tyvok machine is that they're designed to be beginner-friendly. The A1 Mini comes almost fully assembled, it works with all the standard software, and it's built to last. So even if you make a few mistakes when you're starting out, you'll be up and running perfectly in no time.
---
Just getting started with your new Tyvok A1 Mini? Check out our complete step-by-step setup guide to help you get up and running correctly.