


Can a 10W Laser Cut Wood? A Complete Guide for Tyvok A1 Mini Owners
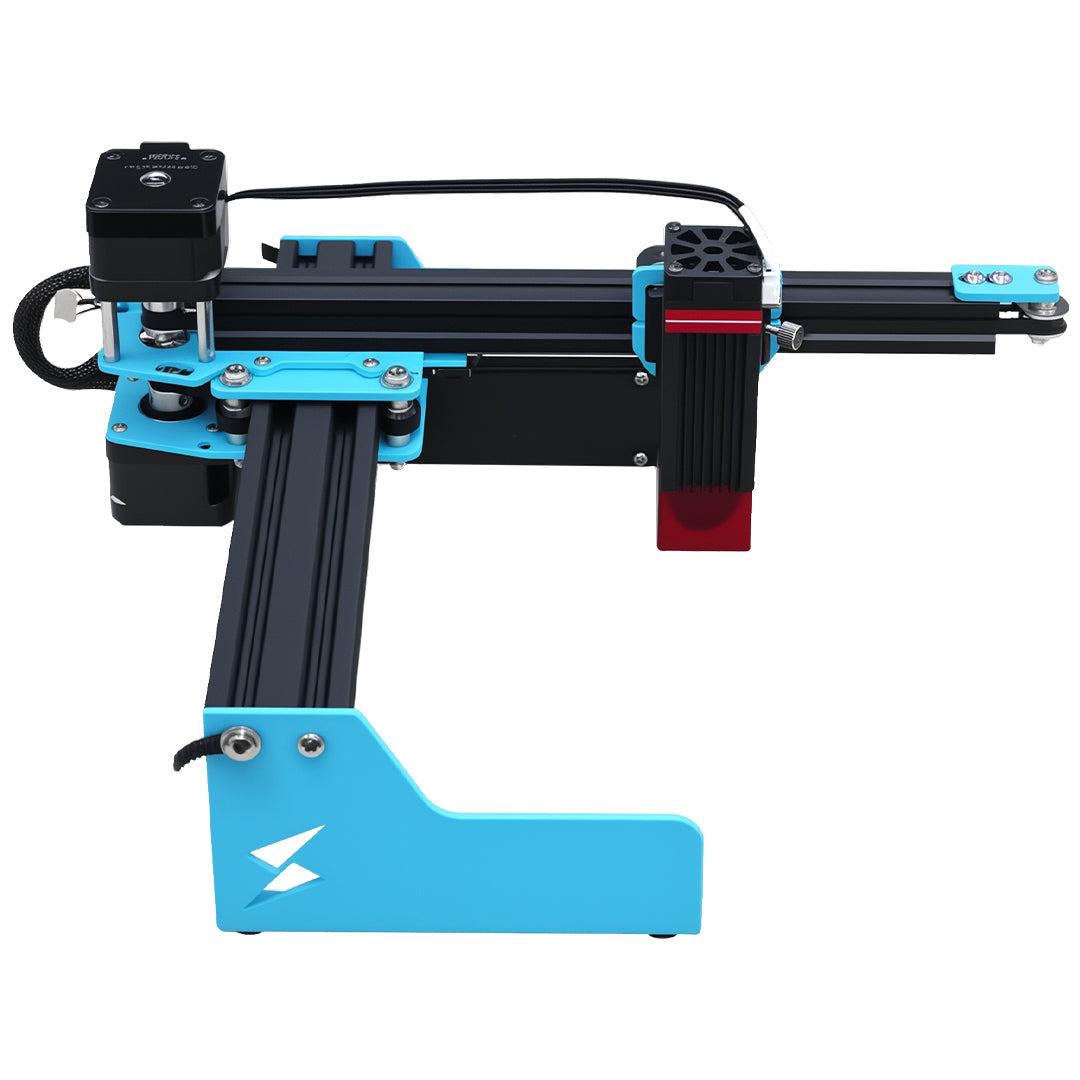
One of the most common questions we get from beginners who are thinking about buying a Tyvok A1 Mini 10W or a Tyvok P2 is "Can a 10W laser actually cut wood?" It's a great question because cutting wood is one of the most common things people want to do with their laser engraver.
In this complete guide, we're going to answer that question and tell you everything you need to know about cutting wood with the 10W version of the A1 Mini. We'll cover how thick it can cut, what settings you should use, tips for getting clean cuts, and when you might need more power.
The Short Answer
Yes, a 10W laser like the one in the Tyvok A1 Mini can absolutely cut wood. How thick depends on the type of wood and whether you're willing to do multiple passes, but for most hobbyist and small business purposes, it's more than capable.
Here's what you can expect:
- 3mm plywood: Cuts through in one pass easily
- 5mm hardwood: Can cut through in 2-3 passes
- 6-8mm softwood: Can cut through in 3-4 passes
For almost all small projects that people make with an entry-level laser – keychains, coasters, jewelry, small signs, boxes – the 10W A1 Mini has more than enough power to cut the wood you'll need.
What Factors Affect How Well a Laser Cuts Wood?
It's not just about the power of the laser. Several factors affect how easily your laser can cut wood:
1. Type of Wood
Different types of wood cut very differently:
Softwoods (pine, cedar, balsa): Softwoods are less dense, so they cut easier. A 10W laser can cut thicker softwoods than hardwoods in fewer passes. Balsa in particular cuts very easily – you can cut through 6mm balsa in just a couple of passes.
Hardwoods (maple, birch, oak, cherry): Hardwoods are denser, so they require more passes to cut through. 3mm hardwood cuts fine in one or two passes, but thicker hardwoods will need more passes.
Plywood: Plywood varies a lot depending on the quality, but most common 3mm and 5mm plywood cuts well with 10W. Higher-quality plywood with fewer voids cuts cleaner than cheap plywood with lots of gaps and glue.
MDF: MDF is very dense, so it's harder to cut than most natural woods. You can cut 3mm MDF with 10W, but it will take multiple passes, and it produces a lot of dust.
2. Focus
Having your laser properly focused is critical for getting clean cuts. If the laser isn't in focus, the energy is spread out over a larger area, so it doesn't cut as deeply. Always use the focus gauge that came with your A1 Mini to get the focus right before you start cutting.
This is one of the most common mistakes beginners make – they don't focus correctly, and then they wonder why the laser won't cut through. It only takes 30 seconds to check the focus, and it makes a huge difference.
3. Air Assist
Air assist blows a stream of air across the cutting area, which helps blow away the smoke and vapor from the cut. This allows the laser to cut more cleanly and deeper with the same power. While you can cut wood without air assist on the A1 Mini, having air assist does make it easier and gives you cleaner cuts.
It's not absolutely essential when you're just starting out, but it's a nice upgrade to consider later if you do a lot of cutting.
4. Number of Passes
With a 10W laser, you don't have to get through the entire thickness in one pass. You can do multiple passes, where the laser goes over the same cut line multiple times, gradually cutting deeper each time. This is how you can cut thicker wood even with only 10W.
The tradeoff is that multiple passes take more time, but for most small projects, it's not a big deal. It's better to take a little extra time and get the cut you need than to spend a lot more money on a higher-powered machine.
How Thick of Wood Can the Tyvok A1 Mini 10W Cut?
Here's a more detailed breakdown based on different types of wood:
3mm (1/8 inch) Plywood or Hardwood
Number of passes: 1
Speed: 50-100 mm/s
Power: 80-100%
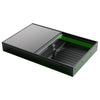
3mm is the most common thickness for small laser projects like keychains, coasters, and jewelry, and the 10W A1 Mini cuts through this easily in one pass. The edges come out clean with minimal charring, especially when you have a good honeycomb platform like the Tyvok engraving platform that lets the laser pass through cleanly.
This is the thickness that most beginners will use for the majority of their projects, and the A1 Mini handles it perfectly.
5mm (3/16 inch) Plywood or Softwood
Number of passes: 2
Speed: 80-100 mm/s per pass
Power: 80-100%
5mm is great for thicker projects like small boxes, thicker coasters, and some types of signs. The 10W A1 Mini can't cut through this in one pass, but two passes will get through it easily. The result is a clean cut with just a little bit of charring on the edges that sands out easily.
5mm Hardwood
Number of passes: 3
Speed: 80-100 mm/s per pass
Power: 80-100%
Denser hardwood takes an extra pass, but it still cuts through just fine.
6mm (1/4 inch) Softwood
Number of passes: 3-4
Speed: 100 mm/s per pass
Power: 80-100%
Again, the 10W can do it, you just need multiple passes. If you're doing a small number of projects, this is perfectly acceptable. It takes a little more time, but it gets the job done without you having to invest in a more powerful machine.
6mm (1/4 inch) Hardwood
Number of passes: 4-5
Speed: 100 mm/s per pass
Power: 80-100%
It can be done with multiple passes, but it does take a while. If you're only doing it occasionally, it's fine. If you're doing a lot of projects that require 6mm hardwood, you might want to consider a higher-powered laser down the road. But for most beginners, it's not something you need to worry about when you're just starting out.
Recommended Settings for Cutting Different Woods with 10W
Here are our recommended starting settings for cutting different types of wood with the 10W Tyvok A1 Mini. Always do a test cut on a scrap piece of the same wood first to make sure the settings work for your particular machine.
| Material | Thickness | Number of Passes | Speed (mm/s) | Power (%) |
|---|---|---|---|---|
| Balsa | 3mm | 1 | 150 | 60-70 |
| Balsa | 6mm | 2 | 150 | 60-70 |
| Pine (softwood) | 3mm | 1 | 100 | 70-80 |
| Pine | 6mm | 3 | 120 | 70-80 |
| Plywood | 3mm | 1 | 60-100 | 70-80 |
| Plywood | 5mm | 2 | 80-100 | 80-90 |
| Birch (hardwood) | 3mm | 1-2 | 80-100 | 70-80 |
| Birch | 5mm | 3 | 80-100 | 80-90 |
| MDF | 3mm | 2 | 50-80 | 80-90 |
Remember, these are just starting settings. Different batches of wood can have different moisture content and density, so always do a test cut first before you cut your good material.
Tips for Getting Clean Cuts with 10W
Whether you're doing one pass or multiple passes, these tips will help you get cleaner cuts with less charring:
1. Use a Quality Honeycomb Platform
A good honeycomb platform like the Tyvok engraving platform is critical for getting clean cuts. The honeycomb lets the laser pass all the way through the wood without hitting a solid surface underneath, which prevents back burning and gives you cleaner edges on the bottom of your work.
If you try to cut wood on a solid surface, you'll get a lot of extra burning on the bottom of your cut, and the smoke can't get away as well, so you get more charring on the edges. The honeycomb platform improves ventilation and gives you cleaner cuts.
2. Mask Your Wood Before Cutting
Many people cover their wood with blue painter's masking tape before cutting. This helps prevent charring on the top surface of the wood, so you have less cleanup to do after cutting. The masking tape catches the smoke residue, and you just peel it off when you're done.
This is especially helpful when you're cutting light-colored woods like maple or birch, where charring shows up more. It doesn't take long to apply the tape, and it gives you a much cleaner result.
3. Use Multiple Passes Instead of One High-Power Pass
When you need to cut through thicker wood, it's better to do multiple passes at moderate power than one pass at full power. Multiple passes give you a cleaner cut with less charring, because the laser isn't dwelling in one spot for too long with full power.
It might take a little more time, but the result is better. And with the A1 Mini, even multiple passes don't take that long for most small projects.
4. Sand the Edges After Cutting
Even with the best technique, you'll usually get a little bit of charring on the cut edges. This is normal with laser cutting. You can easily remove it by sanding the edges with fine-grit sandpaper (220-400 grit). Just a quick sanding is all you need to get clean, smooth edges.
5. Keep Your Lens Clean
A dirty lens reduces your effective power, so your cuts won't go as deep. Clean your lens regularly (weekly if you do a lot of cutting) to maintain maximum power. This is one of the most overlooked things that affects cutting performance.
6. Let the Smoke Get Away
Good ventilation isn't just for your health – it also helps you get cleaner cuts. When the smoke is pulled away from the cutting area, it doesn't leave as much residue on your wood, which gives you cleaner cuts. Make sure your ventilation is working properly when you're cutting.
When Do You Need More Than 10W?
The 10W A1 Mini is capable of cutting most wood that beginners and small businesses need for small projects. But there are some situations where you might need more power:
1. You Regularly Need to Cut Thicker Than 6mm
If you're doing a lot of projects that require cutting 10mm or thicker wood, then you'll probably want a more powerful laser. The 10W can do it with a lot of passes, but it takes a really long time, and it's not very efficient.
2. You Need to Cut a Lot of Material Quickly
If you're doing production work where you need to cut a lot of pieces quickly, more power means you can do it in fewer passes, which saves you time. For most beginners starting out, this isn't an issue – you can work your way up.
3. You Need to Cut a Lot of Thick Acrylic
Thick acrylic requires more power. But again, for most small projects where you're using 3mm or 5mm acrylic, the 10W A1 Mini can handle it.
The good news is that when you're just starting out, you probably don't need more than 10W. Most beginners start with small projects anyway, and the A1 Mini will handle everything you need for the first year or two of your laser journey. When you start getting more orders and you need to cut thicker material more often, you can always upgrade then.
3.5W vs 10W: Which One Should You Choose for Cutting Wood?
The Tyvok A1 Mini comes in both 3.5W and 10W versions. If cutting wood is important to you, we recommend getting the 10W version. The 3.5W can engrave wood fine, but it's really only capable of cutting very thin wood (under 3mm) even with multiple passes.
If you're on an extremely tight budget and you only plan to do engraving, not much cutting, the 3.5W is fine. But if you want to be able to cut wood for projects, the extra money for the 10W is definitely worth it. The 10W gives you much more versatility, and it will handle everything you need as a beginner.
Common Problems When Cutting Wood (and How to Fix Them)
Here are the most common problems beginners have when cutting wood with a 10W laser, and how to fix them:
Problem: The laser didn't cut all the way through
Solution: Check your focus first – this is the most common cause. If the focus is correct, increase the power by 10% or decrease the speed by 25%, or add another pass.
Problem: There's a lot of charring on the edges
Solution: Try doing multiple passes instead of one high-power pass. Use masking tape on the top surface. Make sure your ventilation is good to pull the smoke away. Clean your lens to make sure you're getting full power.
Problem: The cut is wavy or uneven
Solution: Check your belt tension – if the belts are loose, the movement can be uneven. Check that your rails are clean and lubricated. Make sure your material is perfectly flat and secured so it can't move.
Problem: The back of the wood is burned
Solution: You need a honeycomb platform! A solid surface underneath causes back burning. A Tyvok engraving platform eliminates this problem because the laser passes through the openings after cutting through your wood.
Final Thoughts
So to answer the original question: Yes, a 10W laser can cut wood, and the Tyvok A1 Mini 10W cuts wood very well for most hobbyist and small business needs. You can easily cut through 3mm wood in one pass, and thicker wood with multiple passes. For almost all small projects like keychains, coasters, jewelry, and small boxes, the 10W A1 Mini has more than enough capability.
The 10W version of the A1 Mini gives you the best of both worlds – it's still affordable for beginners, but it has enough power to cut all the wood you'll need when you're starting out. If you've been wondering whether a 10W is enough for your needs, the answer is yes for 90% of beginners.
When you're just starting out, you don't need a 20W or 30W laser. The 10W A1 Mini will teach you everything you need to know about laser cutting and engraving, and it will handle all your early projects perfectly. When you eventually need more power or a larger working area, you can upgrade, but there's no need to spend the extra money when you're just getting started.
Pair your 10W A1 Mini with a quality Tyvok engraving platform, and you'll be cutting beautiful wood projects in no time.
Whether you're just starting out with the compact and affordable Tyvok A1 Mini or looking to upgrade to the faster galvo precision of the Tyvok P2, both machines are more than capable of handling all your wood cutting and engraving needs for small to medium projects.
Just getting started with your Tyvok A1 Mini? Check out our complete setup guide and our complete guide to the best materials for the A1 Mini to help you get up and running quickly.
Related Reading: Can a 10W Laser Cut Wood? Complete Guide for Tyvok A1 Mini Owners 2026
Related Reading: What Can You Engrave With A 3.5W 5W Laser Complete Material List For A1 Mini
Related Reading: How to Set Up Your Tyvok A1 Mini for First Time: Complete Step-by-Step Guide 2026