


Cleaning your laser engraver lens is one of the most important maintenance tasks you can do to keep your machine performing well. A dirty lens reduces your laser power, leads to shallow engraving and cutting, and can even shorten the life of your laser diode. The good news is that cleaning your lens is quick, easy, and doesn't require any expensive tools.
🛒 Check out the Tyvok A1 Mini here
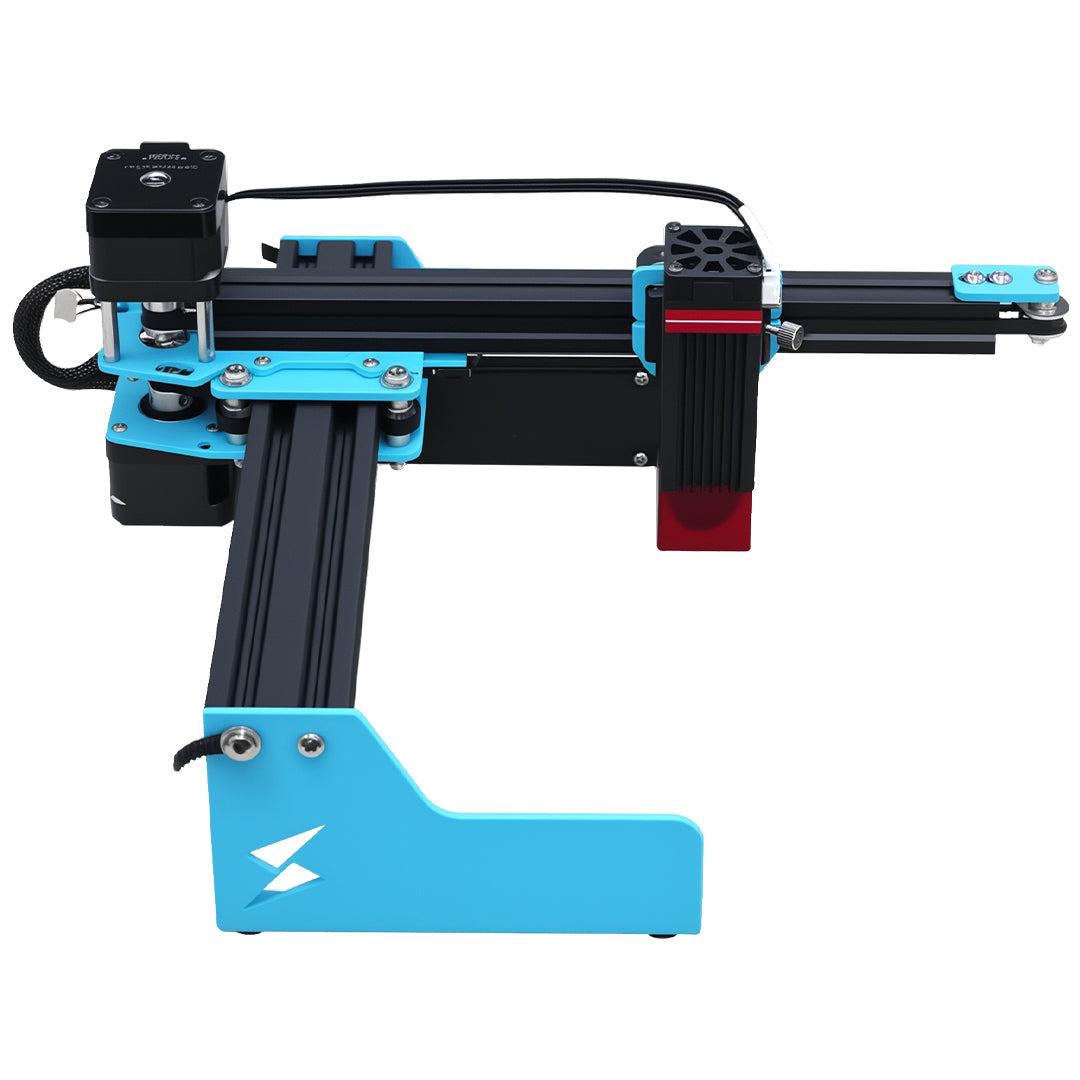
In this step-by-step guide, we'll walk you through exactly how to clean your laser engraver lens safely, how often you should do it, what supplies you need, and what mistakes to avoid. Whether you own an entry-level machine like the Tyvok A1 Mini or a production galvo like the Tyvok P2 10W Galvo, these steps will help you keep your lens clean and your laser performing at its best.
🛒 Check out the Tyvok A1 Mini here
Why Does Your Laser Lens Get Dirty?
When your laser engraves or cuts material, it creates smoke and fine debris. Some of that smoke and debris sticks to the surface of your lens. Over time, this builds up into a thin, sticky film that absorbs some of the laser energy before it ever reaches your material.
Even a thin film of smoke residue can reduce the effective power reaching your material by 10-20% or more. That might not sound like much, but it can make the difference between a deep, clean engraving and a shallow, faint one. It can also mean you have to run slower or do more passes to get the same result, which wastes your time.
Regular cleaning prevents this buildup and keeps your laser performing like new.
What Supplies Do You Need?
You don't need anything fancy to clean your laser lens. Here's what we recommend:
👉 Learn more about What is MDF and Is It Safe for Laser Engraving? best galvo laser engraver here
Essential Supplies:
- Isopropyl alcohol (91% or higher) - Lower percentages (like 70%) have more water, which can leave streaks. 91% or 99% works best.
👉 Learn more about [Tyvok P2 10W galvo vs Tyvok A1 Mini here
- Cotton swabs (Q-tips) - Get the good quality ones that don't leave a lot of lint behind.
- Lens cleaning paper or microfiber cloth - Optional, but good for a final wipe if you need it.
- Compressed air - Optional, but useful for blowing off loose dust before you start.
That's it! You probably already have most of these things at home. You don't need to buy expensive specialized lens cleaning solutions from the laser manufacturer—plain isopropyl alcohol works perfectly.
🛒 Check out the Tyvok Spider X1S Pro here
What to Avoid:
- ❌ Paper towels: They can scratch the lens coating and leave lint behind.
- ❌ Regular tap water: Leaves mineral deposits and doesn't cut through the oily smoke residue well.
- ❌ Harsh chemicals or cleaners: Can damage the anti-reflective coating on the lens.
- ❌ Tissue: Leaves lint and can scratch.
Stick with isopropyl alcohol and cotton swabs, and you'll be fine.
How Often Should You Clean Your Lens?
How often you need to clean your lens depends on how much you use your machine and what materials you're cutting/engraving. Here's a good general guideline:
👉 Learn more about How to Choose Laser Power for Different Materials here
-
Light use (1-2 hours per week): Clean once every 4-6 weeks
-
Moderate use (3-5 hours per week): Clean once every 2-3 weeks
-
Heavy use (10+ hours per week): Clean once every week
-
Cutting a lot of wood or MDF: Clean more often—these materials produce more smoke
-
Engraving acrylic: Acrylic produces a lot of sticky smoke residue, so you might need to clean more often
If you notice that your engraving is getting shallower or your cuts aren't going all the way through even with the same settings, that's a good sign that it's time to clean your lens. It doesn't hurt to check it even if you haven't hit your regular cleaning schedule yet.
👉 Learn more about How to Start a Laser Engraving Business with Under $200 here
On machines like the Tyvok A1 Mini, the lens is easy to access, so you can quickly check it any time you're having issues. It only takes a couple of minutes, so it's worth doing.
🛒 Check out the Tyvok A1 Mini here
Step-by-Step: How to Clean Your Laser Engraver Lens
Follow these steps to clean your lens safely and effectively. We'll use the Tyvok A1 Mini as an example, but the basic steps are the same for most diode laser engravers including the Tyvok P2 10W Galvo.
🛒 Check out the Tyvok A1 Mini here
Step 1: Turn Off Your Machine and Let It Cool Down
Always turn off your machine and unplug it before you start cleaning. This prevents any accidental laser firing while you're working near the lens. It also gives the diode and lens time to cool down—you don't want to clean a hot lens.
🛒 Check out the TyvokStudio Laser Software here
Wait 10-15 minutes after turning it off for everything to cool down completely.
Step 2: Access the Lens
On most diode lasers, the lens is located in the laser head at the bottom. On the Tyvok A1 Mini, you can simply move the laser head to the middle of the bed and access the lens from below. You don't need to remove anything to clean it on most machines, but if your lens is screwed into a holder, you might need to unscrew it to get full access.
🛒 Check out the Tyvok A1 Mini here
Be careful when handling the lens—hold it by the edges, not the flat surface where the laser goes through. Oils from your fingers can leave deposits on the lens.
Step 3: Blow Off Loose Dust
If you have compressed air, give the lens a quick blast to blow off any loose dust and debris before you start wiping. This removes any loose particles that could scratch the lens when you wipe it.
If you don't have compressed air, you can gently blow on it yourself—just be careful not to spit any moisture on it.
Step 4: Dampen Your Cotton Swab
Take a fresh cotton swab and dampen the tip with isopropyl alcohol. You want it damp, not soaking wet. If it's dripping, squeeze off the excess alcohol against the side of the bottle.
Too much alcohol isn't dangerous, but it can leave streaks if it drips, and it takes longer to dry.
Step 5: Gently Wipe the Lens
Very gently wipe the surface of the lens in a circular motion. Don't press hard—the lens is fragile, and pressing too hard can crack it or scratch it. The smoke residue comes off easily with just light pressure.
If your lens is really dirty, you might need to use a second cotton swab with fresh alcohol after the first one picks up a lot of residue.
Step 6: Dry the Lens
Take a second clean, dry cotton swab and gently wipe the lens again to remove any excess alcohol and prevent streaks. Again, use very light pressure.
If you see any lint from the cotton swab left on the lens, you can use a piece of lens cleaning paper or a very clean microfiber cloth to gently lift it off. Don't rub hard—just touch it lightly and the lint will stick to the paper.
Step 7: Let It Fully Evaporate
Wait a couple of minutes for any remaining alcohol to evaporate completely before you put everything back together and turn on your machine. Alcohol evaporates quickly, so this doesn't take long.
Step 8: Reinstall If You Removed It
If you had to remove the lens from the laser head to clean it, carefully reinstall it now. Make sure it's seated correctly and securely—don't over-tighten any screws. On machines like the Tyvok A1 Mini, you don't need to remove the lens to clean it, so this step isn't necessary.
🛒 Check out the Tyvok A1 Mini here
How to Clean the Lens on a Tyvok A1 Mini
If you own a Tyvok A1 Mini, cleaning the lens is especially easy:
🛒 Check out the Tyvok A1 Mini here
-
Turn off the machine and let it cool
-
Move the laser head to the center of the work area
-
The lens is visible on the bottom of the laser head
-
Simply reach up and gently clean it in place using the steps above
-
No disassembly required!
That's it. It literally takes two minutes. Because it's so easy, there's no excuse not to do it regularly.
How to Clean the Lens on a Tyvok P2 10W Galvo
The Tyvok P2 10W Galvo also has an accessible lens that's easy to clean:
🛒 Check out the Tyvok A1 Mini here
-
Turn off the machine and let it cool completely
-
Access the laser head according to the manual
-
Clean the lens using the same alcohol and cotton swab method
-
The process is just as simple—galvo lenses just need to be cleaned regularly like any other lens
🛒 Check out the Tyvok P2 10W Galvo here
Common Mistakes to Avoid
Even though cleaning your lens is simple, there are a few common mistakes that beginners make that can damage the lens. Avoid these:
Mistake 1: Pressing Too Hard
The lens is made of glass or optical plastic, and it's relatively thin. Pressing too hard when you wipe can crack the lens or scratch it. You really only need very light pressure—the alcohol does most of the work of dissolving the smoke residue.
Mistake 2: Using Too Much Alcohol
If your cotton swab is dripping with alcohol, it can run into the laser head and get on other components. It's not the end of the world if this happens, and it will eventually dry, but it's better to avoid it. Just squeeze off the excess before you start wiping.
👉 Learn more about How to Start a Laser Engraving Business with Under $200 here
Mistake 3: Using the Wrong Cleaning Materials
Paper towels, tissue, and regular cloths can leave lint behind and scratch the anti-reflective coating on the lens. Stick with cotton swabs and isopropyl alcohol—it's cheap and it works.
Mistake 4: Forgetting to Let It Dry Before Turning On
Alcohol is flammable, so you want to make sure it's fully evaporated before you turn on your laser. Waiting a couple of minutes is all you need. This is really just a precaution—by the time you're done putting everything back together, it's probably already dry.
🛒 Check out the Tyvok Spider X1S Pro here
Mistake 5: Touching the Lens Surface With Your Fingers
The oils from your skin can leave a residue on the lens that's hard to remove, and it can absorb laser energy. If you need to handle the lens, hold it by the edges, not the flat optical surface. If you do accidentally touch it, just clean it with alcohol after you're done handling it.
👉 Learn more about How to Start a Laser Engraving Business with Under $200 here
Signs That Your Lens Needs Cleaning
How do you know when it's time to clean your lens, even if you haven't hit your regular schedule? Watch for these signs: - Engraving is shallower than normal with the same settings: If you've noticed that you're not getting the same depth you used to get with the same power and speed settings, a dirty lens is the most likely culprit.
👉 Learn more about How to Start a Laser Engraving Business with Under $200 here
- Cuts aren't going all the way through: If your laser used to cut through 1/4 inch plywood in one pass and now it's not, check your lens. A dirty lens reduces effective power.
👉 Learn more about How to Choose Laser Power for Different Materials here
- The lens looks visibly dirty or hazy: If you look at the lens and it looks hazy or you can see discoloration from smoke residue, it's definitely time to clean it.
- You've just done a big cutting job: Cutting produces more smoke than engraving, so after a big cutting job, it's good to check your lens.
👉 Learn more about Laser Cutting and Engraving Plywood here
If you notice any of these signs, don't wait—clean your lens. It only takes a couple of minutes, and it will usually fix the problem.
How to Extend the Life of Your Lens
Besides regular cleaning, here are some tips to help your lens last as long as possible:
1. Use Good Ventilation
Good ventilation helps pull smoke away from the workpiece and the laser head, which means less smoke residue gets on your lens in the first place. Make sure your exhaust is working properly. This not only keeps your lens cleaner—it's also safer because it removes fumes from your work area.
🛒 Check out the Tyvok Spider X1S Pro here
2. Don't Engrave Unsafe Materials
Some materials produce more corrosive smoke that can damage your lens coating over time. Avoid engraving materials that contain PVC or vinyl, which produce corrosive fumes. Stick to the safe materials that are recommended for laser engraving.
🛒 Check out the Tyvok Spider X1S Pro here
3. Keep Your Work Area Clean
Dust and debris from your work area can float around and stick to your lens. Keeping your work area generally clean reduces the amount of dust that gets on your lens.
4. Replace Your Lens When It's Scratched
If your lens gets scratched, no amount of cleaning will fix it. Scratches scatter the laser beam and reduce effectiveness. If your lens is badly scratched, you'll need to replace it. Replacement lenses are relatively inexpensive for most entry-level machines like the Tyvok A1 Mini, so it's not a big expense.
🛒 Check out the Tyvok A1 Mini here
Frequently Asked Questions
Q: Do I need to remove the lens from the laser head to clean it?
A: On most machines, including the Tyvok A1 Mini, you can clean the lens right in place without removing it. This is much faster and easier. You only need to remove it if it's extremely dirty or if you're replacing it.
🛒 Check out the Tyvok A1 Mini here
Q: Can I use window cleaner to clean my laser lens?
A: We don't recommend it. Window cleaner has additives and ammonia that can damage the anti-reflective coating on the lens. Stick with plain isopropyl alcohol—it's cheaper and safer.
Q: My lens still looks cloudy after cleaning. What's wrong?
A: If it's still cloudy after cleaning, the coating might be damaged from corrosive fumes or it might have micro-scratches. In that case, you'll need to replace the lens. It's not expensive for most entry-level machines.
👉 Learn more about Why Tyvok A1 Mini is the Best Entry-Level Laser Engraver for Beginners here
Q: Can a dirty lens damage my laser?
A: Yes, a dirty lens can actually damage your laser diode over time. The dirty lens absorbs more laser energy, which can cause it to get hotter than normal, and that heat can transfer back to the diode. Regular cleaning not only gives you better performance—it also protects your investment.
🛒 Check out the Tyvok Spider X1S Pro here
Q: How long does a laser lens last?
A: With regular cleaning and proper use, a laser lens can last thousands of hours. Most hobbyists will get several years of use out of one lens. If you use your machine heavily, you might need to replace it every year or two, but that's still pretty inexpensive.
🛒 Check out the Tyvok Spider X1S Pro here
Conclusion
Cleaning your laser engraver lens is a simple but important maintenance task that only takes a couple of minutes, but it makes a big difference in your laser's performance. By cleaning your lens regularly, you'll get deeper, more consistent engraving and cutting, extend the life of your laser diode, and get better results from every project.
🛒 Check out the Tyvok A1 Mini here
Whether you own an entry-level machine like the Tyvok A1 Mini or a production galvo like the Tyvok P2 10W Galvo, the process is the same: isopropyl alcohol, a cotton swab, light pressure, and you're done. Add regular lens cleaning to your maintenance routine, and your machine will thank you with consistent, reliable performance for years to come.
🛒 Check out the Tyvok A1 Mini here
If you're due for a cleaning, go do it now—it only takes two minutes!
Looking for an affordable, beginner-friendly laser engraver that's easy to maintain? The Tyvok A1 Mini puts easy maintenance at the top of the list, with accessible lenses and simple upkeep. Check it out today and start creating amazing projects with minimal hassle.