


Paper and Cardstock for Laser Cutting: Best Papers, Settings, Tips 2026
Laser cutting paper and cardstock opens up a whole world of creative projects – from intricate paper cut art and wedding invitations to paper flowers, greeting cards, and scrapbooking embellishments. If you're new to laser cutting paper with your Tyvok A1 Mini or Tyvok P2, you probably have questions about what papers work best, what settings to use, and how to get clean cuts without burning.
In this complete guide, we'll answer all those questions and share pro tips for getting perfect results every time when laser cutting paper and cardstock.
Can You Really Cut Paper with a 10W Diode Laser?
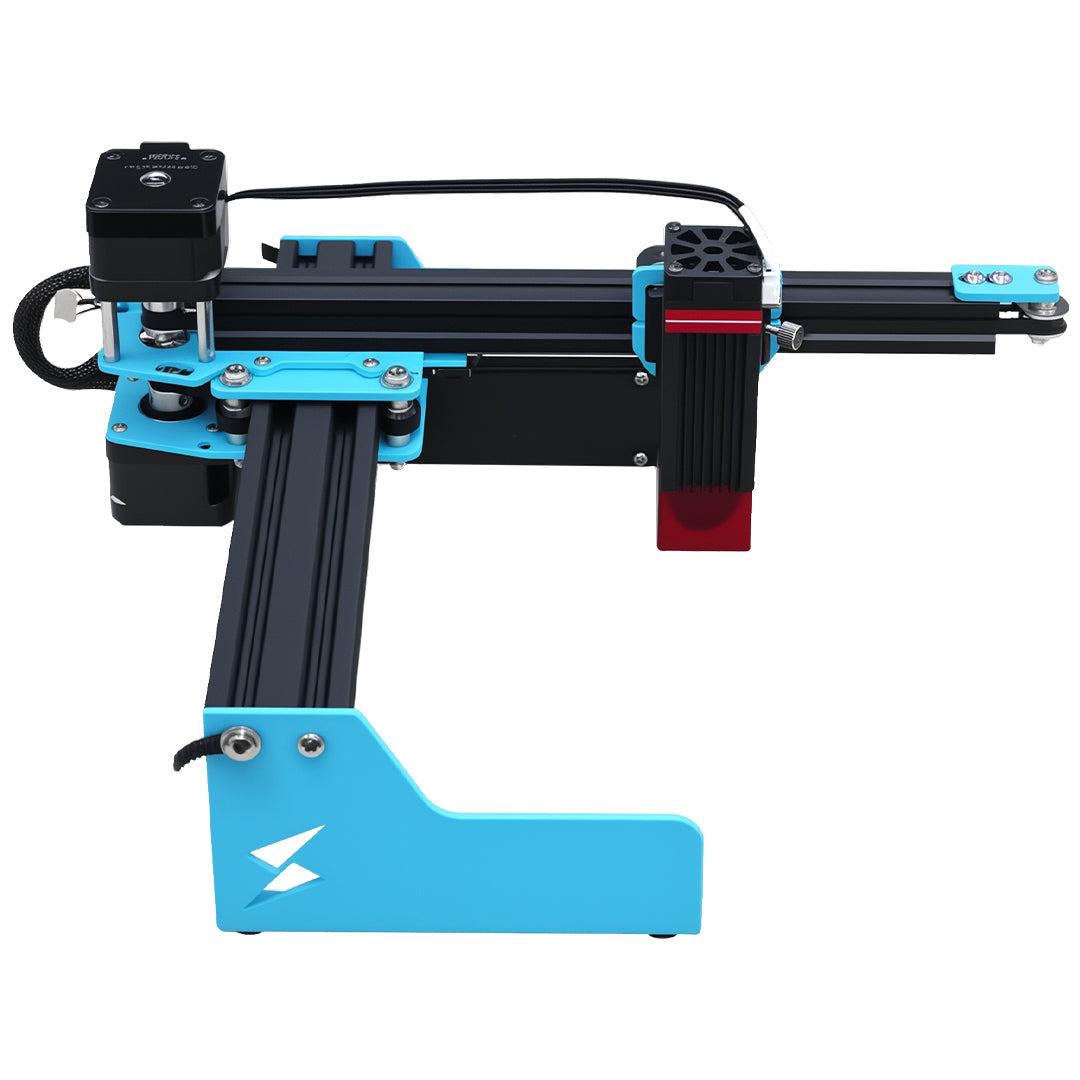
Absolutely! A 10W diode laser like the one in the Tyvok A1 Mini is more than powerful enough to cut through paper and cardstock up to about 300-400 gsm (which is quite thick cardstock). For thinner papers, it can cut through multiple layers at once, which is great for production.
The key to success with paper is using the right settings – fast speed and moderate power work best. Slow speed with too much power will just burn the edges of your paper instead of giving you a clean cut.
What Types of Paper and Cardstock Work Best for Laser Cutting?
Not all paper is created equal when it comes to laser cutting. Here's how different types perform:
Best Papers for Laser Cutting
1. Cardstock (80-400 gsm)
Difficulty: Easy
Result: Excellent, clean cuts
Best for: Greeting cards, invitations, paper crafts, boxes, 3D projects
Cardstock is the most popular material for laser cutting paper projects. It's stiff enough to hold its shape, it cuts cleanly, and it comes in every color imaginable.
- 120-250 gsm is the sweet spot for most projects
- 300-400 gsm works for thicker, sturdier projects (like boxes)
- Multiple passes may be needed for anything over 300 gsm with a 10W laser
2. Watercolor Paper
Difficulty: Moderate
Result: Good, but can be dusty
Best for: Mixed media projects, art paper, invitations with texture
Watercolor paper works fine for laser cutting, but it's thicker and more fibrous, so it produces more dust. It works great for textured art pieces.
3. Cardboard (Thin to Medium)
Difficulty: Easy to moderate
Result: Good for prototypes, packaging
Best for: Prototyping, boxes, packaging inserts, display stands
Thin corrugated cardboard (1-3mm) cuts very well with a 10W diode. Thicker cardboard needs multiple passes. It's great for inexpensive prototyping before cutting more expensive materials.
4. Drawing Paper / Sketch Paper
Difficulty: Easy
Result: Clean, fast cuts
Best for: Practice, patterns, stencils
Thin drawing paper cuts extremely fast and clean. It's great for testing your designs before cutting your good material.
5. Construction Paper
Difficulty: Easy
Result: Good for kids' projects, practice
Best for: Kids crafts, simple projects, inexpensive practice
Construction paper cuts fine, but the colors can sometimes fade a little from the heat. It's fine for casual projects.
6. Parchment Paper
Difficulty: Easy
Result: Translucent, delicate cuts
Best for: Wedding invitations, envelopes, crafts
Parchment is thin and cuts very cleanly. It's popular for elegant invitations because of its translucency.
7. Tissue Paper
Difficulty: Moderate
Result: Very delicate, needs support
Best for: Flowers, decorative elements, layered projects
Tissue paper is very thin and tears easily. You need to tape it down very well or stick it to a temporary backing sheet to keep it from moving. It cuts fine if it's held properly.
8. Vellum
Difficulty: Easy
Result: Clean, translucent cuts
Best for: Overlays, invitations, envelopes
Vellum cuts very cleanly and gives beautiful translucent results. It's a popular choice for elegant wedding invitations.
What Papers Should You Avoid?
There are some types of paper you should never laser cut:
- Paper with metallic coatings: Many metallic coated papers contain plastic or even actual metal foil that can produce toxic fumes when burned. Avoid them.
- Glitter paper: The glitter is usually plastic, and it can create toxic fumes and leave a mess in your laser. Some glitter paper is also coated with plastic.
- Wax-coated paper: The wax will melt and create a big mess, plus it can produce harmful fumes.
- Self-adhesive paper/vinyl: The adhesive can melt and gum up your laser, and many adhesive backings contain plastic.
- Any paper with plastic coatings or laminations: These can produce toxic fumes and ruin your laser. Stick to plain uncoated paper and cardstock.
- Corrugated plastic board: This isn't paper anyway, and it produces toxic fumes.
When in doubt, check if the paper you're using is 100% cellulose (pure paper) with no plastic coatings. If you're not sure, do a small test cut in a corner and check the smell and fumes – if it smells like burning plastic, don't use it.
Recommended Settings for Laser Cutting Paper
Here are our recommended starting settings for different weights of paper and cardstock with a 10W diode laser:
| Material Thickness | Speed (mm/s) | Power (%) | Passes |
|---|---|---|---|
| < 80 gsm (thin paper) | 350-500 | 30-40 | 1 |
| 80-120 gsm (standard paper) | 300-400 | 40-50 | 1 |
| 120-200 gsm (medium cardstock) | 250-350 | 50-60 | 1 |
| 200-300 gsm (heavy cardstock) | 200-300 | 60-70 | 1 |
| 300-400 gsm (extra heavy cardstock) | 150-250 | 70-80 | 1-2 |
| 1-3mm corrugated cardboard | 100-200 | 80-100 | 1-3 |
| Laser engraving paper | 300-500 | 20-40 | 1 |
Important Setting Tips:
-
Speed is your friend: The key to clean cuts on paper is going fast with moderate power. Slow speed gives the heat more time to spread, which burns the edges.
-
Air assist: Always use air assist when cutting paper. It keeps the cut clean, reduces burning, and blows away the ash and smoke.
-
Multiple thin layers: If you need to cut 10 identical pieces for wedding invitations, you can usually stack 3-5 sheets of thin cardstock and cut them all at once with a 10W laser. This saves a lot of time.
Step-by-Step: How to Get Clean Cuts on Paper
Here's our proven process for getting perfect laser cuts on paper every time:
Step 1: Prep Your Paper
Start with a clean, dry sheet of paper. Make sure it's flat – if it's curled, you can iron it on low heat or put it under a heavy book overnight to flatten it.
If your paper has any wrinkles, it will be hard to get a clean cut because the focus will change across the sheet. Flatten it first.
Step 2: Secure It to Your Bed
This is another critical step. Paper is lightweight, and the air from your air assist can blow it around if it's not secured properly.
Here are the best methods for securing paper:
Method 1: Blue Painter's Tape (Best for most projects)
Put strips of low-tack blue painter's tape around all four edges of your sheet. This holds it flat and doesn't leave residue when you peel it off. Make sure the tape is tight and the paper doesn't move.
Method 2: Spray Adhesive (Best for intricate cuts)
If you're doing very intricate cuts with lots of small pieces, you can spray a light coat of temporary spray adhesive on the back of your paper and stick it to a scrap piece of cardstock or acrylic. This holds everything perfectly in place. Just make sure the adhesive is fully dry before you put it in the laser – you don't want wet adhesive fumes.
Method 3: Vacuum Table (If you have one)
If your laser has a vacuum hold-down table, that works perfectly for paper. Just turn on the vacuum and it holds everything flat.
Never cut paper that's not secured – even a tiny movement during cutting can ruin your whole design.
Step 3: Set Your Focus
Set your focus at the top surface of the paper. Since paper is thin, focus accuracy is important for clean cuts. If you're multiple layers, focus on the top layer.
Step 4: Do a Test Cut
Always do a small test cut in a corner or on a scrap piece of the same paper. This lets you check if your settings cut all the way through without burning.
If the paper cuts all the way through but the edges are dark brown from burning, you need to increase your speed (don't just decrease power – fast speed is what prevents burning).
If it doesn't cut all the way through, increase power by 10% or add another pass.
Step 5: Run the Cut
Start your job. Paper cutting is usually fast because of the high speeds, so it doesn't take long. Keep your ventilation on – cutting paper produces smoke and ash that you want to pull out of the laser enclosure.
Step 6: Remove Your Pieces
When the cut is done, carefully remove your paper from the laser. Peel off the tape, and gently separate the cut pieces from the background.
If you used spray adhesive, you might need to carefully peel the paper off your backing sheet. A sharp utility knife can help loosen stubborn pieces.
Step 7: Clean the Edges (If Needed)
If you have just a little bit of light brown discoloration on the cut edges (this sometimes happens with darker papers), you can gently clean it off with a pencil eraser. Just rub the eraser along the edge and the discoloration comes right off.
If you used the right settings, you shouldn't need much cleaning – the edges should be pretty clean already.
Pro Tips for Better Paper Cutting Results
These professional tips will help you avoid common mistakes and get better results:
1. Always Use Air Assist
We can't stress this enough. Air assist keeps the cut line cool, blows away smoke and debris, and gives you much cleaner cuts. Without air assist, you'll get more burning on the edges. Even with the right settings, no air assist = more burning.
2. Keep Your Lens Clean
Cutting paper produces a lot of fine smoke residue that can build up on your lens. If your lens is dirty, it reduces the effective power of your laser, so your cuts won't go through. Clean your lens regularly when doing a lot of paper cutting.
3. Use a Grid or Honeycomb Bed
A honeycomb or grid bed gives the smoke and debris somewhere to go when you cut through the paper. It also helps prevent back-burning on the back of your paper. If you don't have a honeycomb bed, you can raise the paper up on slats to create space underneath.
4. For Intricate Detailing: Use Lower Power, Faster Speed
When you're cutting very intricate designs with lots of small delicate pieces, go even faster with a little less power. This gives you cleaner, less burnt cuts, and the delicate pieces are less likely to burn or warp.
5. Remove Small Pieces As You Go (If Doing Layers)
If you're cutting multiple layers of a complex design, remove the cut small pieces before you add the next layer. This prevents them from moving around.
6. Use a Vector Pre-Score for Folds
If you're making a 3D project like a box or a card that needs folds, you can use the laser to pre-score the fold lines. Just use very low power (10-20%) at high speed – you just want to score the surface, not cut all the way through. This gives you perfectly straight, clean folds.
7. Work with the Grain (For Cardboard)
When cutting corrugated cardboard, you'll get cleaner cuts if you align your cuts with the grain of the corrugation rather than across it. This isn't a big deal for simple shapes, but it makes a difference for intricate cuts.
8. Let It Cool Before Handling
Thick cardstock can be a little warm after cutting. Let it cool for a minute before you handle it – this makes it less likely to tear when you're separating pieces.
Common Problems (and How to Fix Them)
Here are the most common issues people run into when cutting paper, and how to fix them:
Problem: The edges are burnt and brown
Solution: Your speed is too slow or your power is too high. Increase the speed by 50-100 mm/s and keep the power the same or slightly lower. Fast speed = less heat buildup = less burning. Also make sure air assist is on.
Problem: The cut doesn't go all the way through
Solution: Increase power by 10-15%, or add another pass. If your lens is dirty, clean it – a dirty lens reduces power. Also check your focus – if you're out of focus, you won't get full power at the surface.
Problem: The paper moved during cutting and ruined the design
Solution: You didn't secure it well enough. Next time, tape all four edges, use more tape, or use spray adhesive for intricate designs. The paper must not move at all.
Problem: Small delicate pieces won't release from the background
Solution: Your power was too low, or it didn't cut all the way through. Increase power slightly, and make sure you cut through completely. You can also use a sharp needle or utility knife to help release stubborn small pieces.
Problem: There's smoke residue on the surface of my paper
Solution: Your ventilation isn't good enough, or you cut too slow. You can usually gently wipe light smoke residue off with a dry cloth. For darker residue, try a very slightly damp cloth (don't get it too wet – it will warp the paper). Next time, improve your ventilation.
Problem: The back of my paper is burnt
Solution: You're not leaving enough space under the paper. Use a honeycomb bed that lets the laser pass through without hitting a solid surface right under the paper. If you're cutting on a solid bed, raise the paper up on slats.
Popular Paper Cutting Project Ideas
Once you get the hang of it, there are so many amazing projects you can do:
- Wedding invitations and reply cards – Custom, intricate designs that you can make yourself for a fraction of the cost of custom printing
- Greeting cards for every occasion – Birthday cards, holiday cards, thank you cards with custom cutouts
- 3D paper crafts – Boxes, gift bags, party favors, decorative ornaments
- Paper flowers – Layered paper flowers for wall decor, weddings, bouquets
- Paper cut art and wall decor – Intricate artistic cut designs for framing
- Scrapbooking embellishments – Custom shapes and designs for scrapbook pages
- Stencils – Custom stencils for painting, crafts, and baking
- Bookmarks and gift tags – Quick, easy projects that make great gifts
- Pop-up cards – Complex pop-up designs with precise cuts
- Paper lanterns and party decorations – Custom decorations for parties and events
How Thick Can a 10W Diode Laser Cut Paper?
A 10W diode like the Tyvok A1 Mini will easily cut through cardstock up to 400 gsm in 1-2 passes. For anything thicker than that (like multiple layers or heavy cardboard up to 3mm), you just need additional passes.
If you're doing a lot of production paper cutting, the Tyvok P2 galvo laser can cut much faster than a traditional gantry diode laser, which saves you a lot of time when you're cutting dozens of invitations or cards.
Safety Considerations
Cutting plain uncoated paper is generally safe with a diode laser, but you still need to follow basic safety rules:
-
Never leave your laser unattended: Paper can catch fire if the settings are wrong or if the laser gets stuck. Always stay close when cutting paper.
-
Always use good ventilation: Cutting paper produces smoke and fine ash that you don't want to breathe. Keep your fume extractor running during the job.
-
Never cut coated or treated papers: As we mentioned earlier, many coated papers contain plastic or other chemicals that can produce toxic fumes when burned. Stick to plain uncoated paper and cardstock.
-
Keep a fire extinguisher nearby: It's unlikely that paper will catch fire with the right settings, but it's always good practice to have a fire extinguisher near your laser just in case.
Final Thoughts
Laser cutting paper and cardstock is one of the most accessible projects for beginners with a 10W diode laser. It's fast, it's relatively easy once you get the settings right, and you can make amazing projects that are useful and beautiful.
The key secrets to success are simple: use good quality plain uncoated paper, go fast with moderate power, always secure your paper to the bed, and use air assist. Follow those rules, and you'll get clean, crisp cuts with minimal burning that look professional.
Whether you're making wedding invitations, greeting cards, paper art, or 3D boxes, the Tyvok A1 Mini has more than enough power to handle all your paper cutting projects. If you're doing production work like making dozens of invitations or craft items, the faster speed of the Tyvok P2 will save you hours of time.
Ready to try your first paper cutting project? Start with a simple design on 180-200 gsm cardstock using the settings we've recommended in this guide – you'll probably be surprised at how clean and professional your results are on your first try.
Looking for more beginner's guides to different materials? Check out our complete guide to laser engraving different types of wood to learn the basics of working with the most popular laser engraving material.
Related Reading: Best Acrylic For Laser Engraving And Cutting Beginner S Guide 2026
Related Reading: Best Speed And Power Settings For Laser Engraving Wood 2026
Related Reading: Best Speed and Power Settings for Laser Engraving Wood: Complete Guide 2026