


Best LightBurn Settings for Tyvok A1 Mini: Complete Beginner's Guide 2026
If you've just unboxed your new Tyvok A1 Mini laser engraver and you're staring at LightBurn wondering "what settings do I use?", you're in the right place. Getting the correct Tyvok A1 Mini LightBurn settings is the difference between a crisp, clean engraving and a blurry, burnt mess. This guide breaks down everything you need to know, from initial setup to optimal material-specific settings, so you can get great results on your first try.
👉 Check the latest price and availability of the Tyvok A1 Mini on Tyvok's official website →
What is Tyvok A1 Mini and Why LightBurn Settings Matter
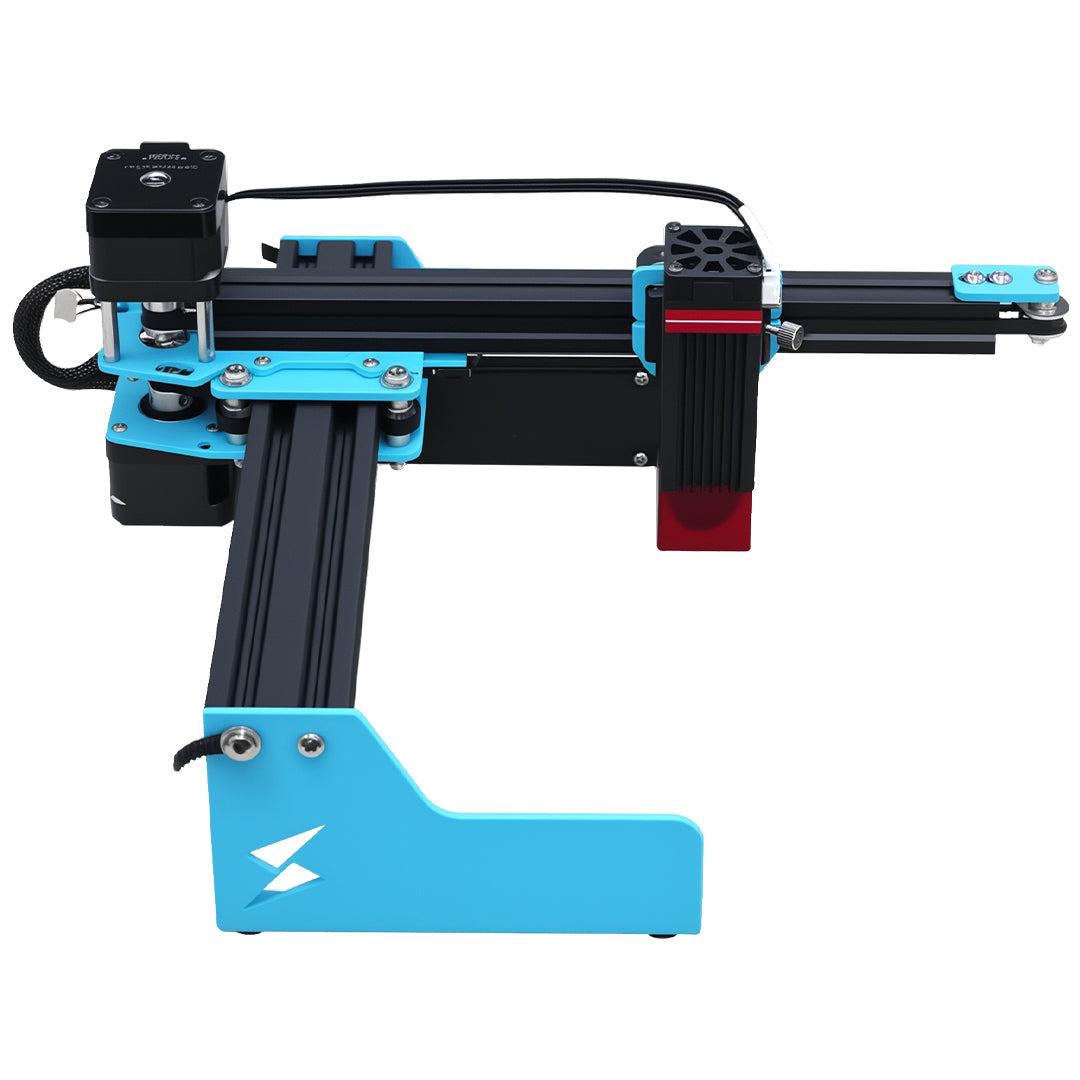
The Tyvok A1 Mini is a compact 5W diode laser engraver that's taken the hobbyist world by storm. It's affordable, easy to assemble, and perfect for beginners who want to get started with laser engraving without breaking the bank. But even the best hardware won't give you good results if your LightBurn settings are off.
What makes Tyvok A1 Mini great for beginners
There's a reason the Tyvok A1 Mini has become so popular with new laser enthusiasts:
- Compact footprint: It fits easily on a small workbench, making it ideal for home workshops
- Pre-assembled design: Most models come mostly assembled, so you can start engraving within an hour unboxing
- 5W optical power output: Enough power to cut through thin materials and engrave a wide variety of substrates
- Affordable price: A fraction of the cost of larger industrial lasers, perfect for testing the waters
- Good focus retention: The fixed-focus design (with adjustable focus knob) makes it easier for beginners to get consistent results
It's the perfect entry-level machine for anyone wanting to make personalized gifts, custom signage, or start a small side business.
How incorrect settings affect your engraving results
When you're new to laser engraving, it's easy to underestimate how much settings impact your final product. Here's what can happen when your Tyvok A1 Mini laser settings are wrong:
- Too much power, too slow speed: Burnt, discolored engravings that look muddy or charred. On wood, this can leave deep, black marks that are hard to sand out. On acrylic, it can melt the material too much and create uneven edges.
- Too little power, too fast speed: Faint, barely visible engravings that you have to go over multiple times. This wastes your time and can cause misalignment if you're not careful.
- Incorrect DPI: Blurry images or text that lacks sharpness, especially for detailed engravings like photos.
- Wrong focus: Soft, unfocused engravings where the laser beam is spread too wide.
Getting the settings right the first time saves you material, time, and frustration. That's why we've put together this guide with tested settings you can start with.
Essential LightBurn Setup for Tyvok A1 Mini
Before you jump into engraving, you need to get your basic device setup right in LightBurn. This only takes a few minutes and ensures everything works properly with your Tyvok A1 Mini.
How to import Tyvok A1 Mini device settings
LightBurn doesn't come with Tyvok A1 Mini pre-configured, but setting it up is straightforward:
-
Download the official device profile: Go to the Tyvok website and download the Tyvok A1 Mini LightBurn profile file (it's usually a
.lbdevfile) - Open LightBurn and go to Edit > Device Settings
- Click Import and select the downloaded
.lbdevfile - The profile will automatically configure:
- Machine size: 200mm x 200mm (the A1 Mini's work area)
- Baud rate: 115200
- Laser type: Diode laser
- Max power: 5W (100% in software)
If you can't find the official profile, you can manually create a device with these settings:
- Working area: 200mm × 200mm
- Origin: Front-left
- Laser position: 100% offset for diode
- S-stage type: Relative
Basic configuration and preferences
Once your device is set up, there are a few basic preferences you should adjust for the Tyvok A1 Mini:
- Enable laser fire button: Go to Edit > Preferences > Device and make sure "Enable fire button" is checked. This lets you test your laser power before starting an engrave.
- Set origin position: Most beginners prefer setting the origin to front-left, which matches how the A1 Mini homes.
- Enable rotary support if needed: If you plan to engrave cylindrical objects like tumblers, enable rotary mode in device settings. The A1 Mini supports most standard rotary attachments.
- Set default speed: For most engraving jobs, start with a default speed of 150mm/s and power of 30% – this is a safe baseline that you can adjust from there.
After setup, do a quick test: Home your machine, move the laser to the center of the bed, and fire a short pulse at 10% power to confirm everything is working.
Best LightBurn Settings for Different Materials
Now for the good stuff – the actual settings you've been looking for. These are tested settings for the 5W optical power of the Tyvok A1 Mini. Remember that these are starting points – always do a small test on scrap material first, since different brands and thicknesses can vary.
Settings for wood and plywood
Wood is the most common material for laser engraving with the Tyvok A1 Mini, and it gives fantastic results. Here are our recommended starting settings:
| Wood Type | Engraving Power | Engraving Speed | Cut Speed (1/8" wood) | Cut Power | DPI |
|---|---|---|---|---|---|
| Basswood (thin) | 30-40% | 150-200 mm/s | 60 mm/s | 70-80% | 300 |
| Plywood (birch) | 35-45% | 120-180 mm/s | 50 mm/s | 80-90% | 300 |
| Hardwood (walnut/cherry) | 25-35% | 150-200 mm/s | 40 mm/s (1/4") | 100% | 300 |
| Pine / Softwood | 20-30% | 200-250 mm/s | 50 mm/s | 80-90% | 300 |
| Balsa | 15-25% | 250-300 mm/s | 80 mm/s | 60-70% | 300 |
Pro tip for wood: Lower power with faster speed usually gives a cleaner, less burnt engraving than high power at slow speed. If you want a deeper engrave without too much burn, do multiple passes instead of cranking up the power.
Settings for acrylic and plastic
Acrylic is another popular material that gives really clean, professional results with the Tyvok A1 Mini. There are two types: cast acrylic (better for engraving) and extruded acrylic (better for cutting).
| Acrylic Type | Engraving Power | Engraving Speed | Cut Speed (1/8") | Cut Power | DPI |
|---|---|---|---|---|---|
| Cast Acrylic (any color) | 40-50% | 200-250 mm/s | 50 mm/s | 80-90% | 300 |
| Extruded Acrylic | 30-40% | 200 mm/s | 60 mm/s | 70-80% | 300 |
| Colored Acrylic Sheet | 35-45% | 180-220 mm/s | 50 mm/s | 85-100% | 300 |
| Plastic (ABS thin) | 20-30% | 250-300 mm/s | 80 mm/s | 60-70% | 200 |
Important safety note: Always make sure the plastic you're engraving/cutting is laser-safe. Never cut PVC (it releases chlorine gas which is toxic and will damage your machine).
Pro tip for acrylic: When engraving cast acrylic, you get a beautiful frosted effect that really contrasts with the clear background. For dark acrylic, lower the power slightly to avoid over-burning the surface.
Settings for leather and fabric
Leather and fabric are great for making custom accessories like keychains, patches, and jewelry. The Tyvok A1 Mini handles these really well.
| Material | Engraving Power | Engraving Speed | Cut Speed | Cut Power | DPI |
|---|---|---|---|---|---|
| Genuine Leather (thin) | 25-35% | 200-250 mm/s | 80 mm/s (2mm) | 60-70% | 300 |
| Genuine Leather (thick) | 35-45% | 150-200 mm/s | 50 mm/s | 70-80% | 300 |
| Faux Leather | 20-30% | 200-300 mm/s | 80 mm/s | 50-60% | 300 |
| Cotton Fabric | 15-25% | 250-300 mm/s | 100 mm/s | 40-50% | 300 |
| Felt | 20-30% | 200-250 mm/s | 60 mm/s | 50-60% | 200 |
| Polyester Fabric | 15-25% | 300 mm/s | 80 mm/s | 50-60% | 300 |
Pro tip for leather: Do a test in an inconspicuous area first – some dyed leathers will change color dramatically with even low power. For a more subtle engraving, go higher speed and lower power.
Settings for glass and stone
The Tyvok A1 Mini can engrave glass and stone, though you need to manage expectations – it won't do deep engravings like a higher-powered laser, but it can do beautiful surface engravings.
| Material | Engraving Power | Engraving Speed | Number of Passes | DPI | Notes |
|---|---|---|---|---|---|
| Smooth Glass | 30-40% | 150-200 mm/s | 1-2 | 300 | Use a thin layer of dish soap to reduce splintering |
| Tempered Glass | 25-35% | 200 mm/s | 1 | 300 | Don't go too deep or it may crack |
| Ceramic Tile | 35-45% | 120-150 mm/s | 1-2 | 300 | Works best on unglazed ceramic |
| Slate / Stone | 40-50% | 100-150 mm/s | 1-2 | 200 | Gives a nice natural etch effect |
| Marble | 30-40% | 150-200 mm/s | 1 | 300 | Keep power down to avoid cracking |
Pro tip for glass: Always wear eye protection when engraving glass – tiny glass particles can fly around. After engraving, wash off the soap with warm water and you'll be left with a crisp frosted engraving.
Common LightBurn Mistakes to Avoid with Tyvok A1 Mini
Even with the right settings, beginners often make these common mistakes that ruin their engravings. Here's what to watch out for.
Power and speed balance issues
The number one mistake beginners make with the Tyvok A1 Mini is cranking the power all the way to 100% for everything. Remember: this is a 5W diode laser – you don't need 100% power for most engraving jobs.
- High power + slow speed = burning, charring, and melted material
- Lower power + faster speed = cleaner, crisper results
- If you need deeper cuts, do multiple passes instead of maxing out power
Another common mistake is going too fast with too little power, which leaves you with faint engravings that don't show up well. Always start with our recommended settings above, then adjust from there.
Focus alignment problems
Focus is critical for getting a sharp engraving, and many beginners struggle with this at first. The Tyvok A1 Mini has an adjustable focus, so here's how to get it right every time:
- The paper method: Lower the nozzle until it gently touches a piece of paper placed on your material. If you can pull the paper out but it has a slight indent, your focus is correct.
- Measure your material thickness: The focal point of the A1 Mini's lens is 50mm from the nozzle. Measure your material thickness and adjust the Z height accordingly.
- Don't change focus mid-job: If you're engraving multiple pieces of the same material, your focus shouldn't change.
- Check for warped material: If your wood is warped, the focus will change across the bed. Flatten your material or use a waste board underneath to level it.
Out of focus = blurry engravings – always double-check your focus before pressing start.
Step-by-Step Test Engraving Procedure
Even with our recommended settings, you should always do a test engraving when working with a new material. Here's a simple step-by-step process:
How to do a material test
- Cut a scrap piece of your material that's at least 100mm × 50mm – bigger is better for testing multiple settings.
- Create a test grid in LightBurn: Make a 2×5 grid of squares – 5 different power settings on one axis, 5 different speeds on the other.
- Label each square with the power and speed setting you're going to use.
- Run the test engraving over the entire grid.
- Let it cool down for a minute, then wipe off any smoke residue with a paper towel.
- Compare the results to see which combination gives you the look you want.
LightBurn actually has a built-in material test tool that will automatically generate this grid for you – it's under Tools > Material Test. That makes it even easier.
How to adjust settings based on results
Once you have your test grid, here's how to adjust:
- If it's too faint, not deep enough: Increase power by 10% or decrease speed by 50mm/s
- If it's burnt or discolored: Decrease power by 10% or increase speed by 50mm/s
- If edges are melted on plastic/acrylic: Increase speed and decrease power – you probably have too much heat buildup
- If the wood is too charred: Go faster with less power, or do two lighter passes instead of one heavy pass
Write down the settings that work for each material – you'll thank yourself next time you use that material.
Frequently Asked Questions
Q: Do I need to use air assist with the Tyvok A1 Mini?
A: The A1 Mini works with or without air assist, but we recommend it. Air assist helps blow away smoke and debris, which gives you cleaner engravings and less charring on wood. If you don't have air assist, just clean your lens more often and slightly increase speed/decrease power to compensate.
Q: What DPI should I use for photo engravings with Tyvok A1 Mini?
A: For most photo engravings on wood or acrylic, 300 DPI gives great results. If you're doing a really large engraving, you can drop it to 200 DPI without noticing much difference. Higher than 300 DPI just increases your engraving time without much improvement in quality on a 5W machine.
Q: Can the Tyvok A1 Mini cut through 1/4 inch plywood?
A: It can, but you'll need multiple passes. With 100% power and 30-40 mm/s speed, you'll need 2-3 passes to get all the way through 1/4 inch plywood.
Q: Why does my engraving look spotty or inconsistent?
A: The most common causes are incorrect focus, dirty lens, or the material not being flat. Clean your lens with a cotton swab and rubbing alcohol, check your focus, and make sure your material is secured flat to the work bed.
Q: Do I need to use a honeycomb bed with the A1 Mini?
A: It's not required, but it does help with smoke extraction and prevents back-burn on the bottom of your material. If you're cutting, a honeycomb bed is highly recommended. For just engraving, you can get by with a regular waste board.
Final Tips for Getting Perfect Results
After working with the Tyvok A1 Mini for a while, here are our top tips to consistently get great results with LightBurn:
-
Always do a focus check: It takes 10 seconds and it's the easiest way to avoid blurry engravings. Get in the habit of checking focus every time you change materials.
-
Keep your lens clean: Smoke and debris can build up on the lens, which reduces your effective power and causes uneven engraving. Clean it with a cotton swab and isopropyl alcohol every 5-10 jobs.
-
Start with test cuts: Even if you're using the settings from this guide, always do a small test on scrap material first. Material thickness and composition can vary a lot between brands.
-
Ventilate your workspace: The Tyvok A1 Mini produces smoke when it engraves/cuts, which isn't good to breathe and can also leave residue on your machine and material. Always use a fan or ventilation system to pull smoke away.
-
Save your settings: Once you find a combination that works perfectly for a material, save it as a preset in LightBurn. This saves you time next time you use that material.
-
Don't rush: It's tempting to crank the speed up to finish faster, but going a little slower often gives better results with less chance of mistakes.
-
Secure your material: Even a small shift during engraving can ruin your project. Use tape, clamps, or magnets to hold your material firmly to the work bed.
Final Thoughts
Getting the best Tyvok A1 Mini LightBurn settings is all about starting with a solid baseline and then adjusting for your specific material. The settings in this guide are tested to work with the 5W Tyvok A1 Mini, so they're a great starting point for any beginner.
Remember, even experienced laser users do test cuts before every job – don't get frustrated if your first few attempts aren't perfect. The Tyvok A1 Mini is a fantastic entry-level machine that can produce incredible results once you get the settings dialed in.
If you're still having issues with blurry results after checking your settings, our guide on why is my laser engraving blurry → can help you troubleshoot. And always remember to follow proper laser engraving safety guidelines → to protect yourself while working.
Interested in starting a side hustle with your new machine? Check out 10 easy laser engraving projects that sell → for profitable ideas you can start today. If you're trying to decide between the Tyvok A1 Mini and another popular beginner machine, see our full Tyvok A1 Mini vs Atomstack A5 Pro comparison →.
👉 Ready to get started? Check the Tyvok A1 Mini price and availability on official website →
Start with simple projects, keep notes on what works, and before you know it you'll be cranking out professional-quality engravings and cuts every time.
Happy engraving!
Related Reading: Why Tyvok A1 Mini Is The Best Entrylevel Laser Engraver For Beginners In 2026
Related Reading: Best Materials For Engraving With Tyvok A1 Mini Beginners Guide
Related Reading: Why Tyvok A1 Mini is the Best Entry-Level Laser Engraver for Beginners in 2026
💡 Recommended: The Tyvok P2 2W Galvo Laser is our top pick for metal marking & jewelry engraving. Currently 50% OFF at just $149!